


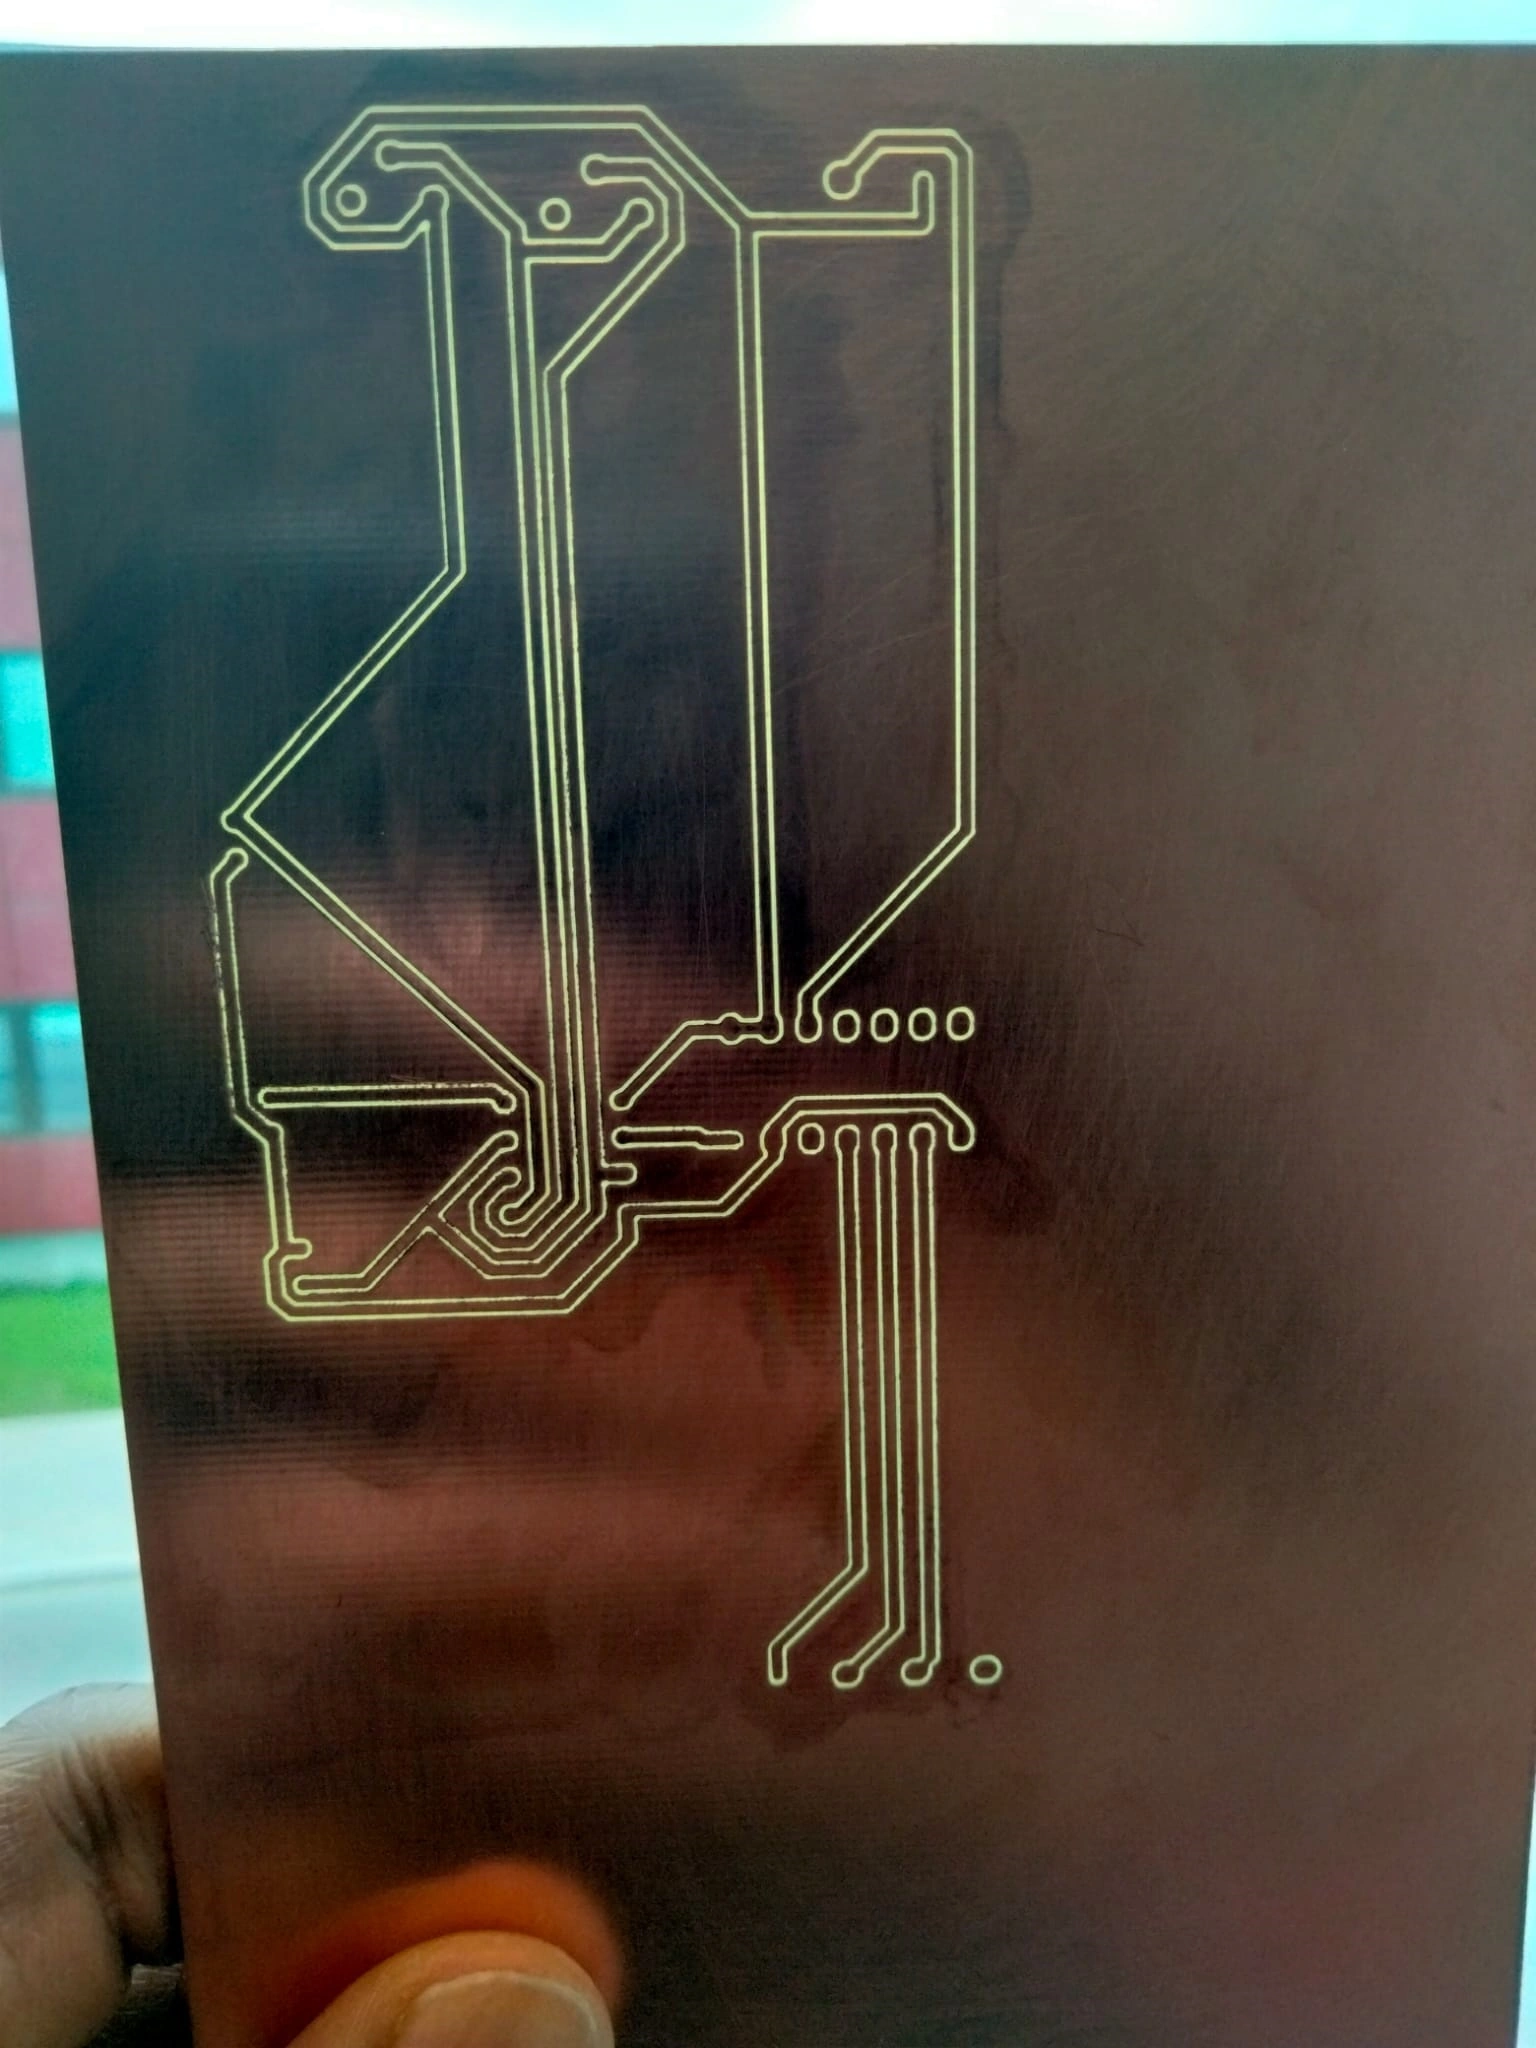
Custom PCBs for Electronics Prototyping

Stay in the loop!
Our direct project newsletter without spam or advertising.
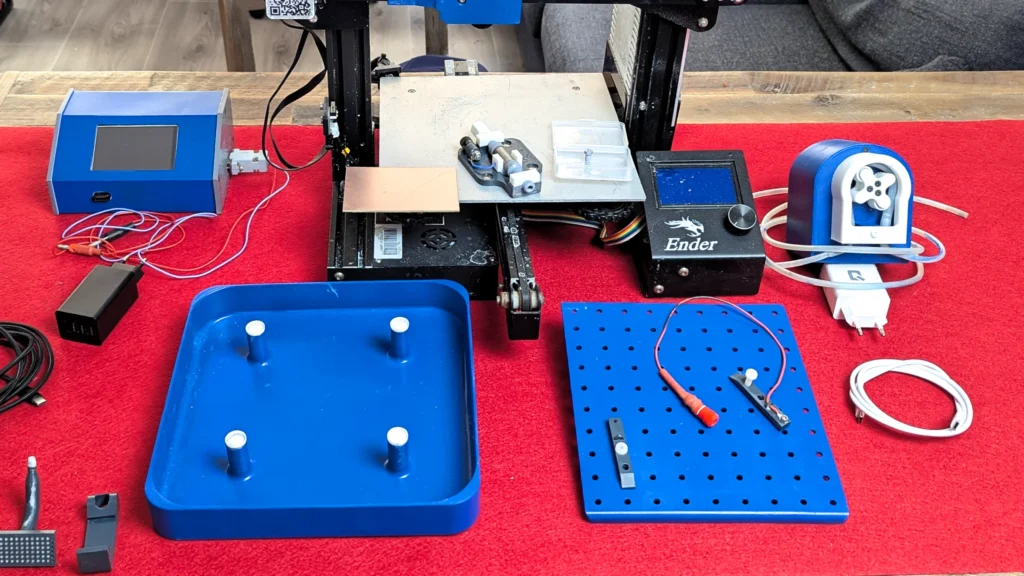
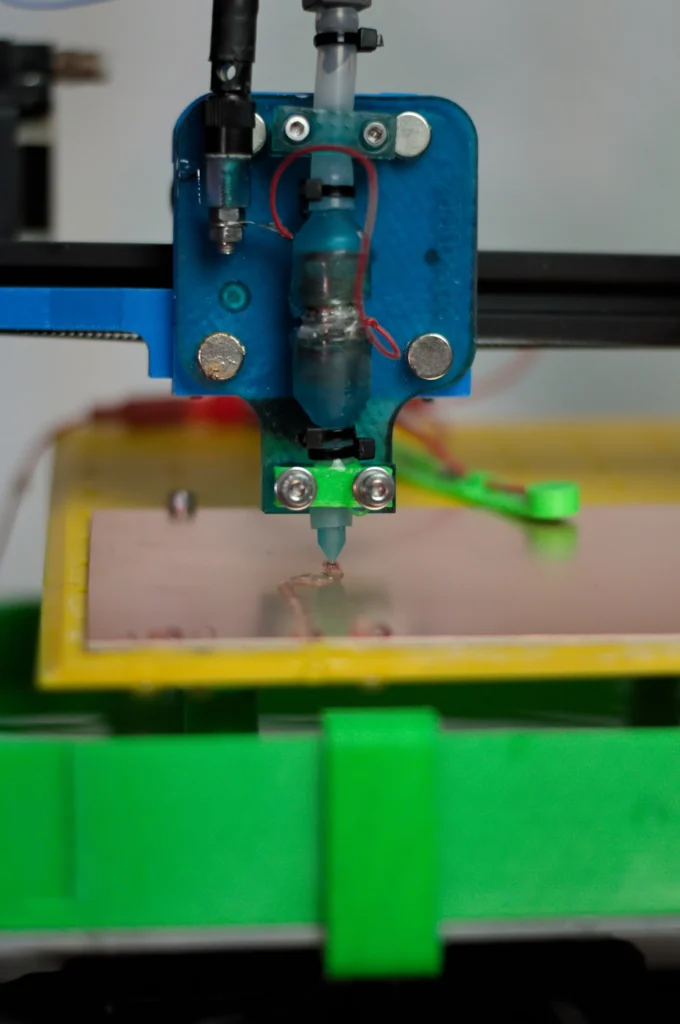
Our Latest Prototype
We developed several prototypes, this is our latest iteration. The project is still a work in progress but it is close to be completed.
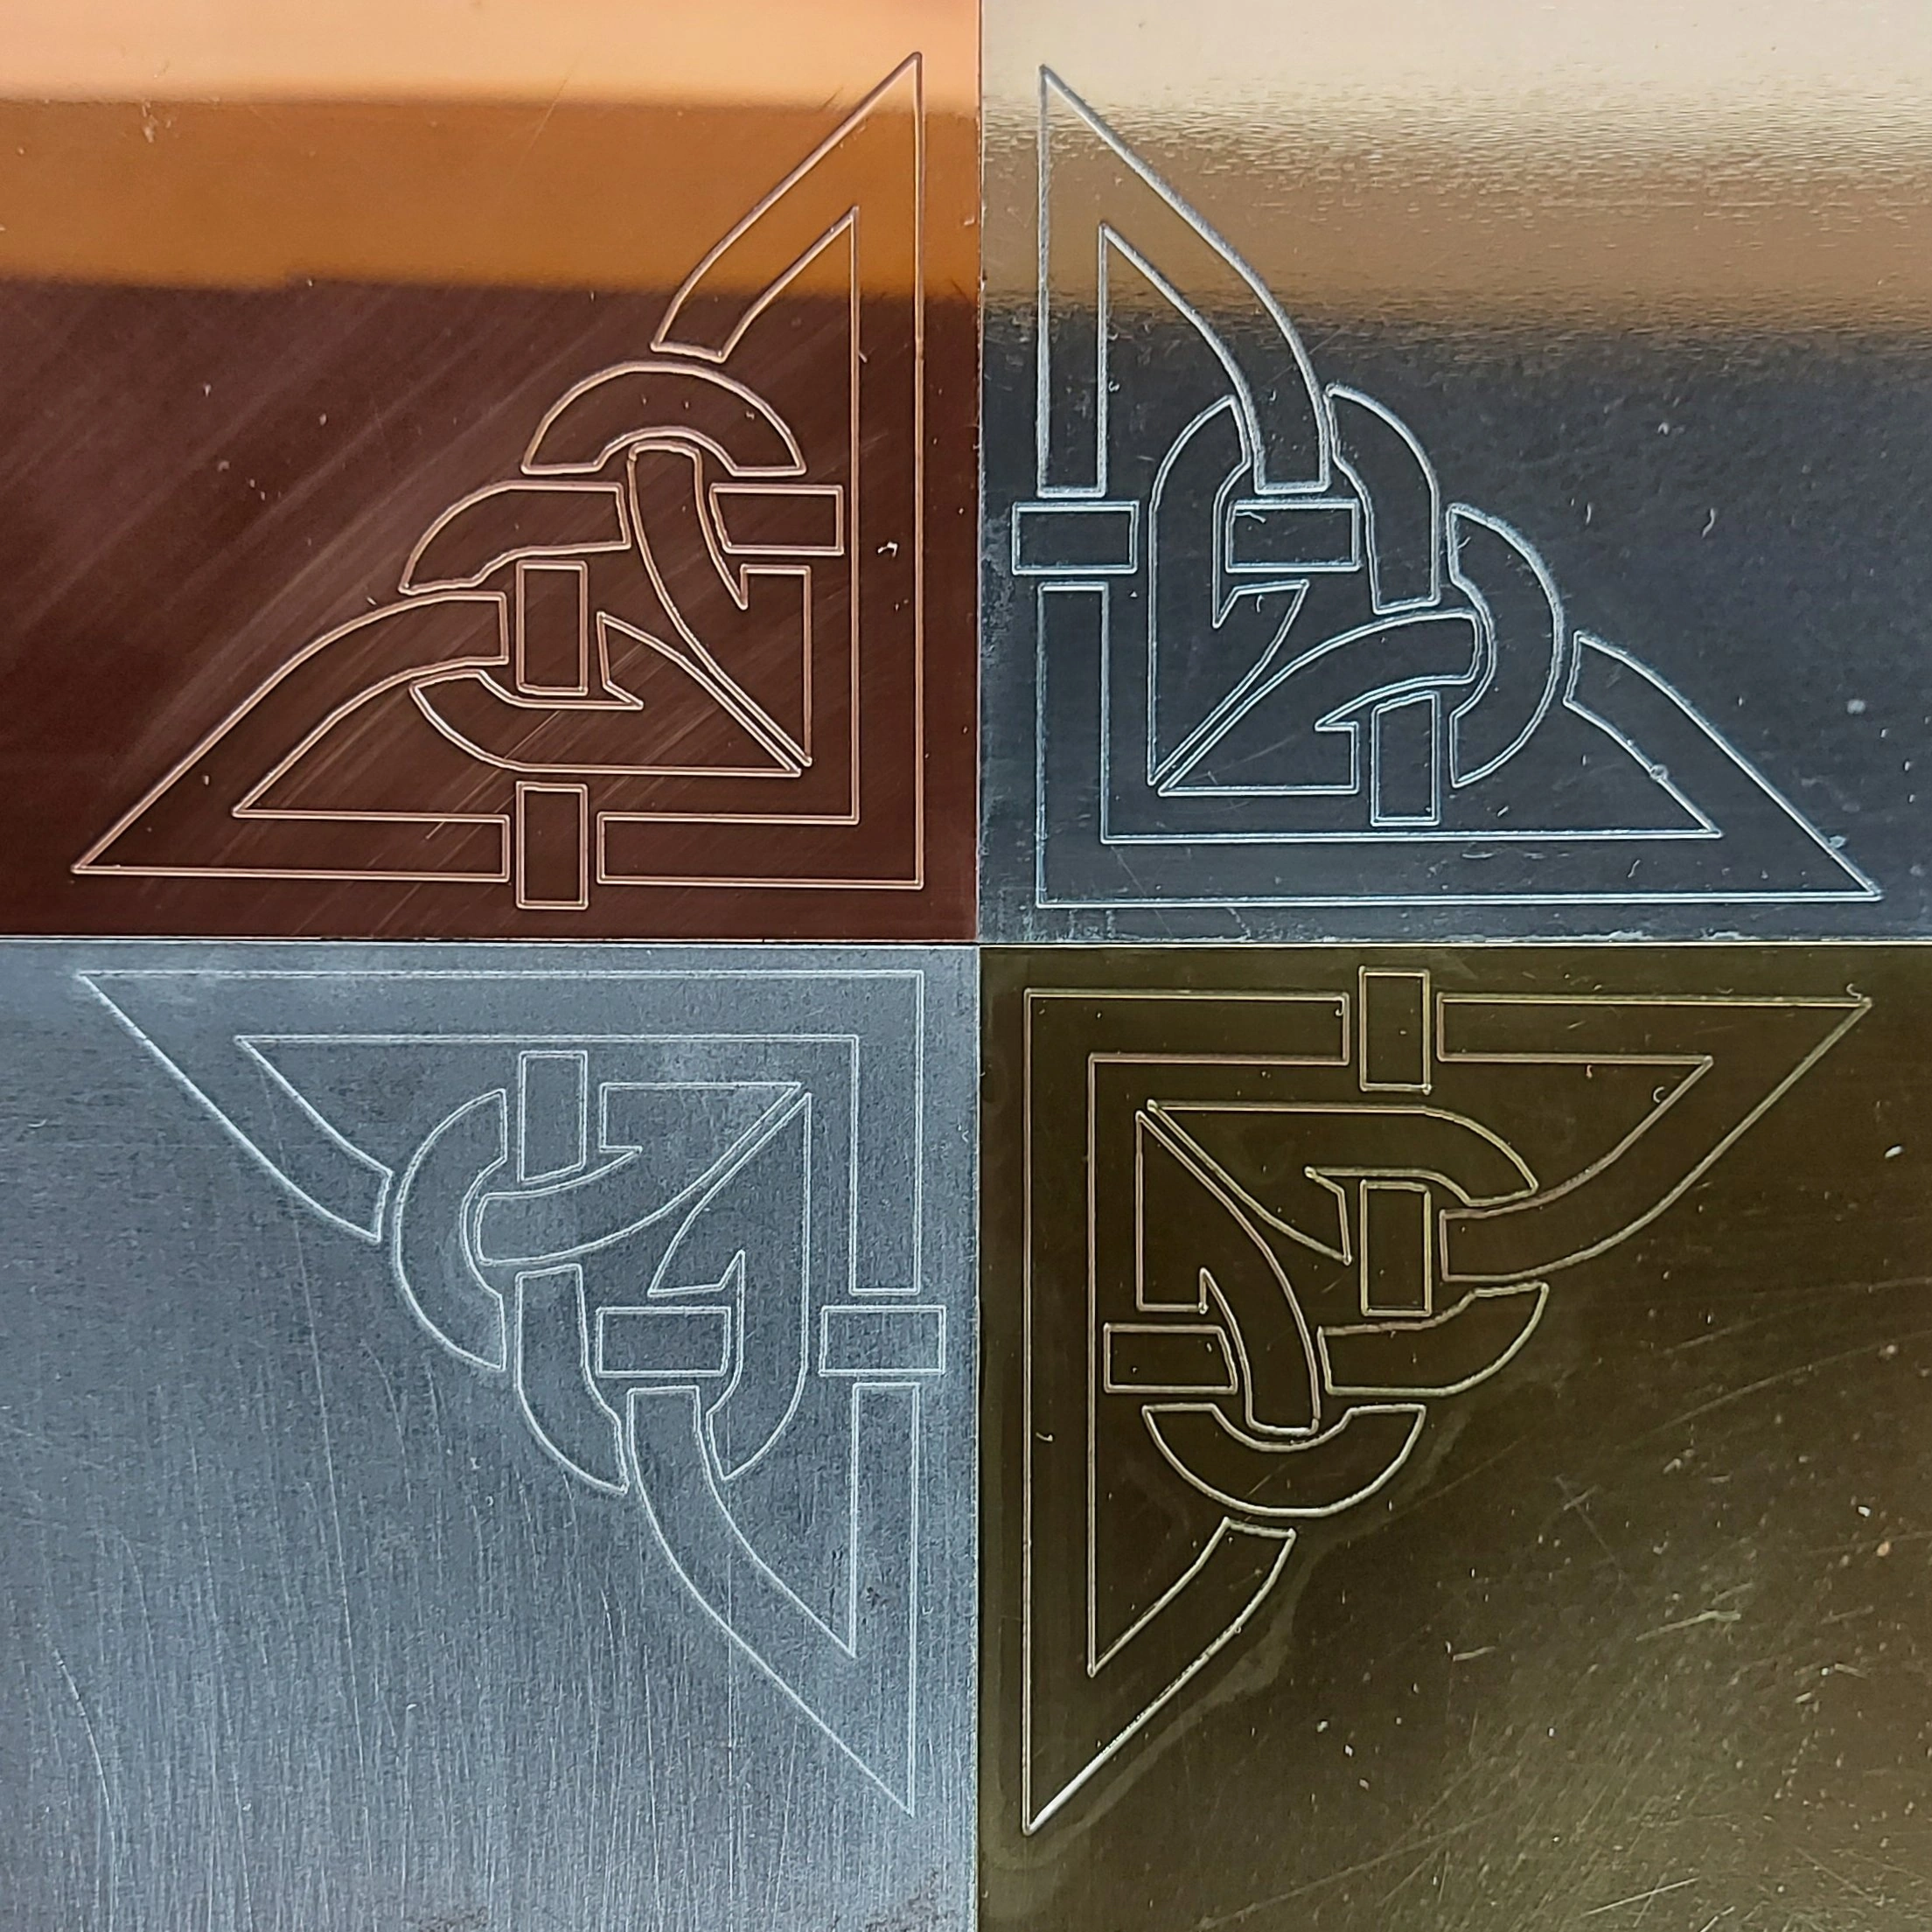
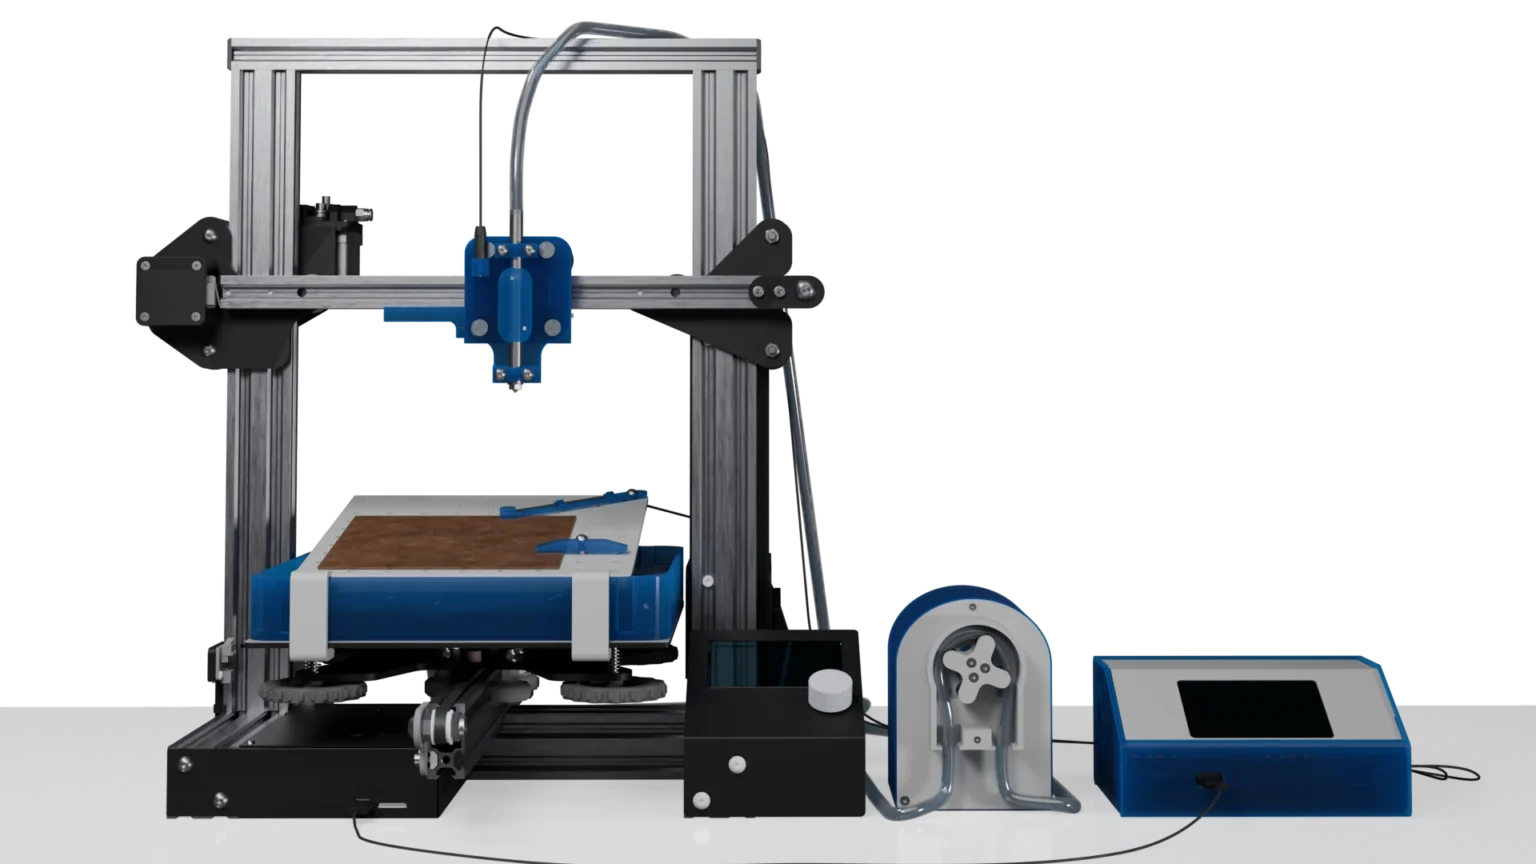
Liquid Blade 3D Experience.
A Quick Overview
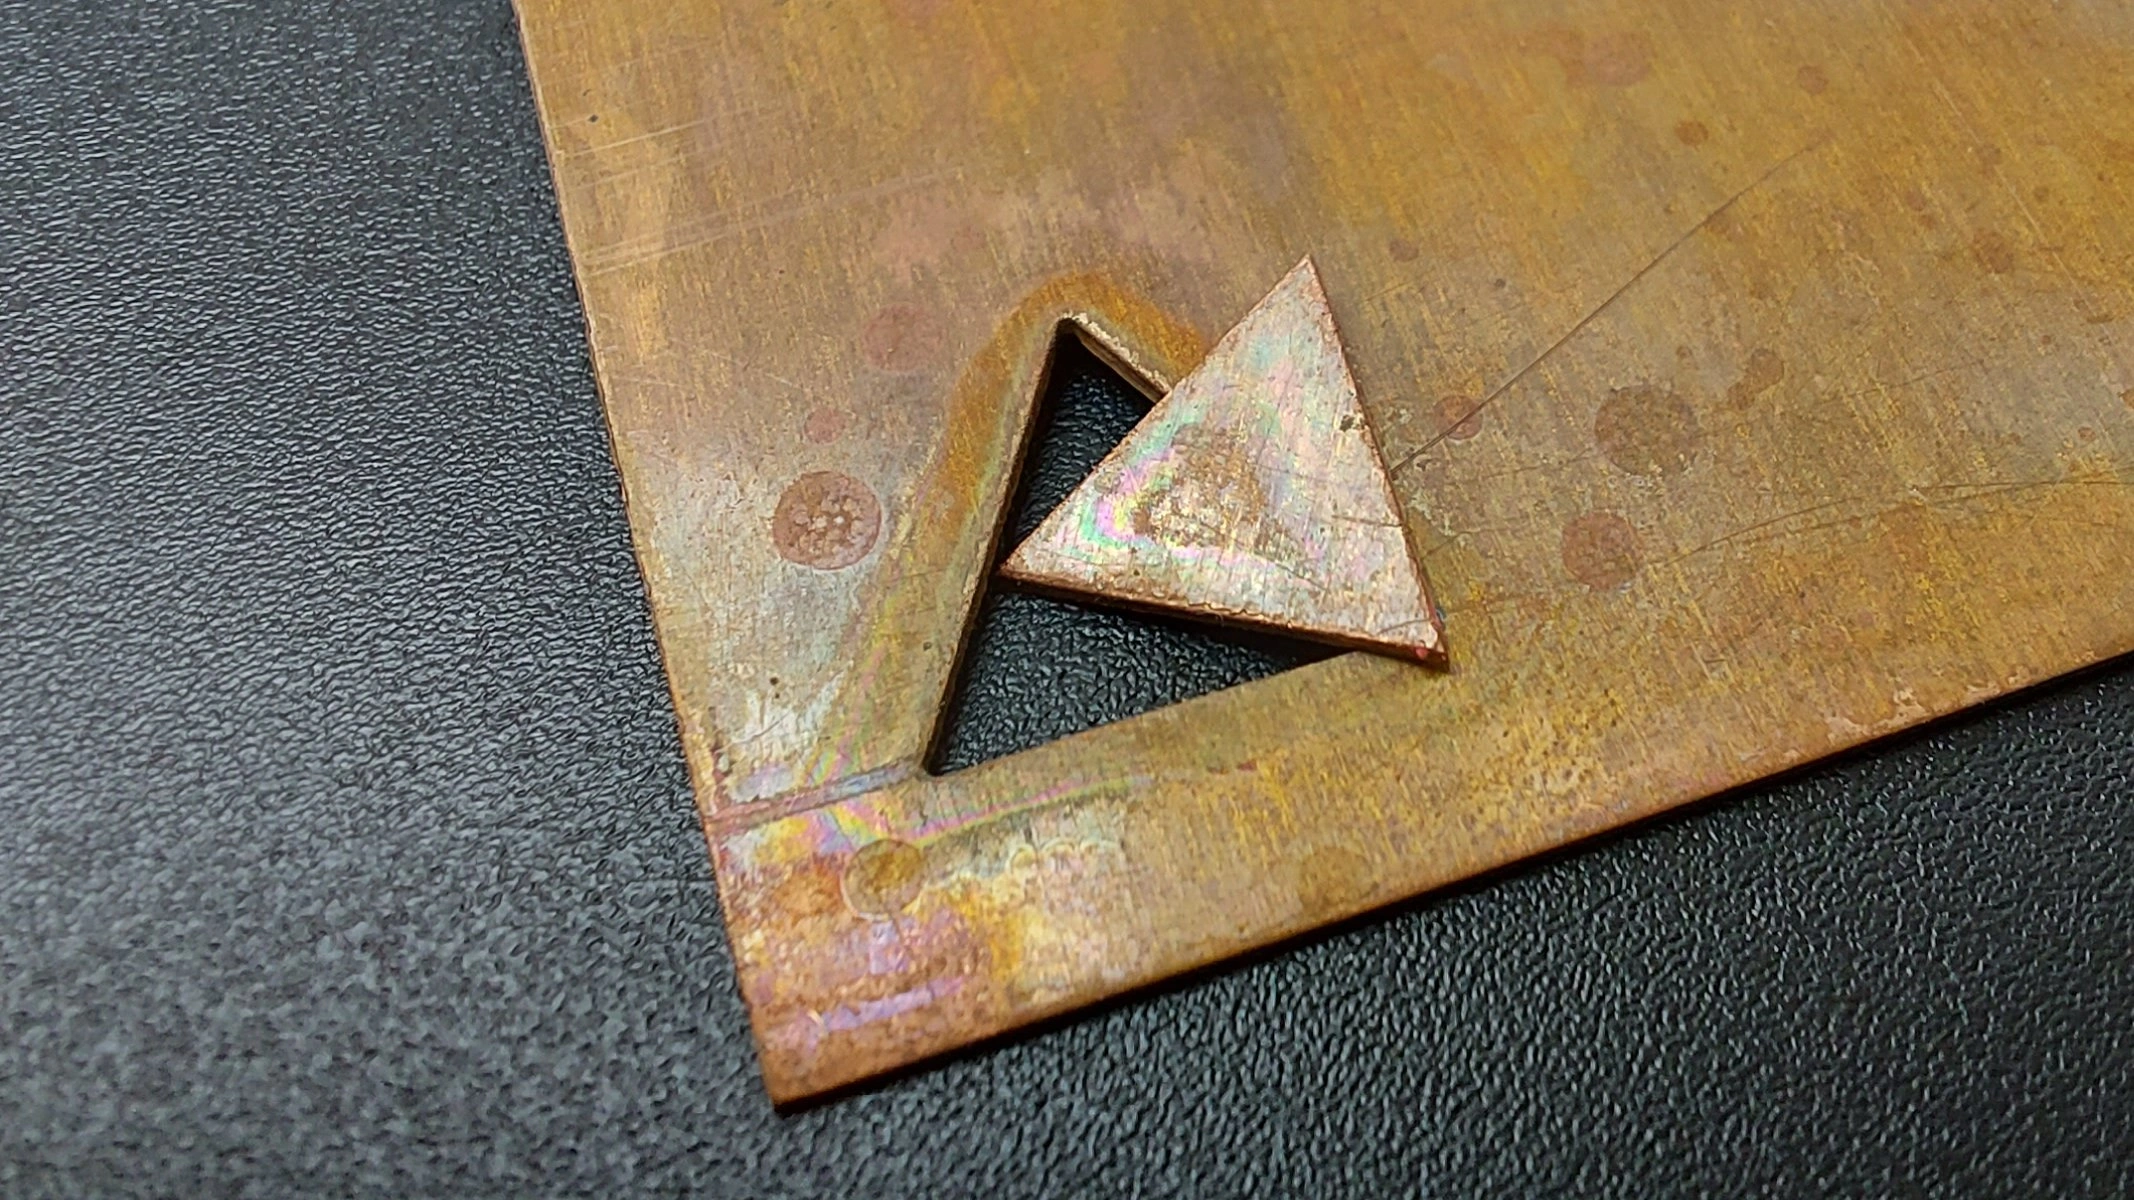
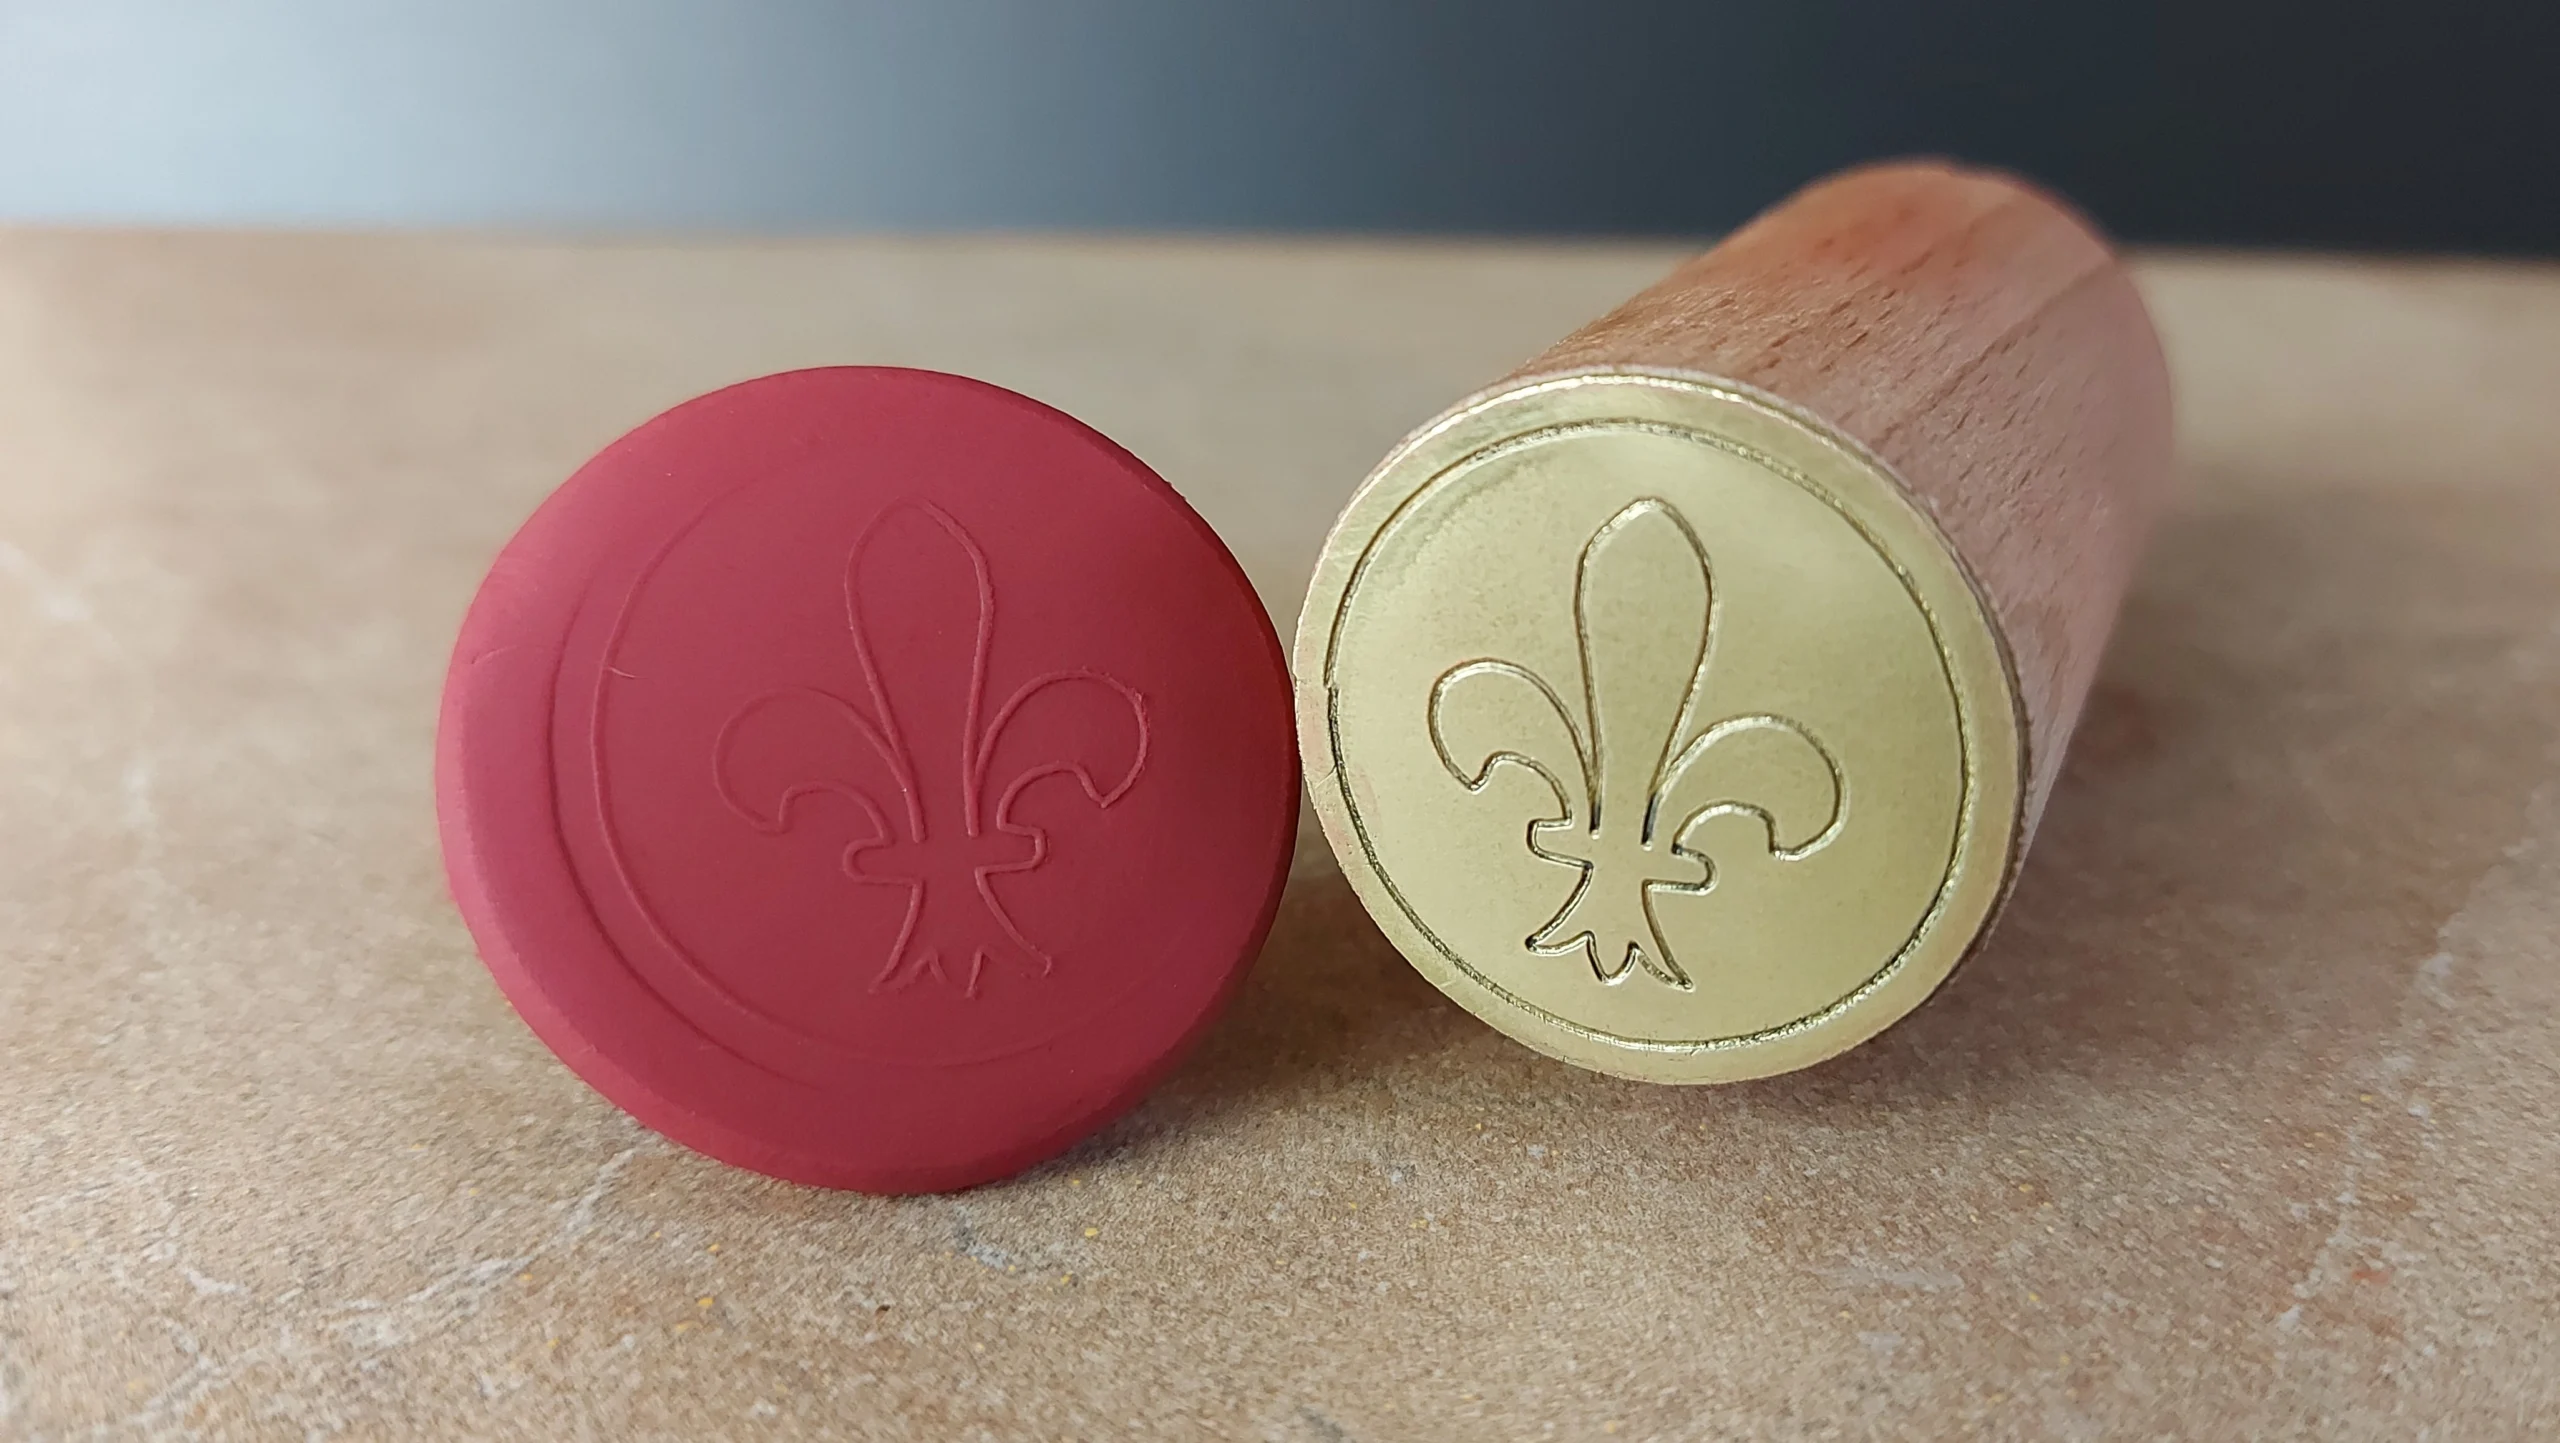
An add-on that allows you to create detailed metal art, custom circuit boards and a range of functional metal components, all through a safe and efficient saltwater-based process.
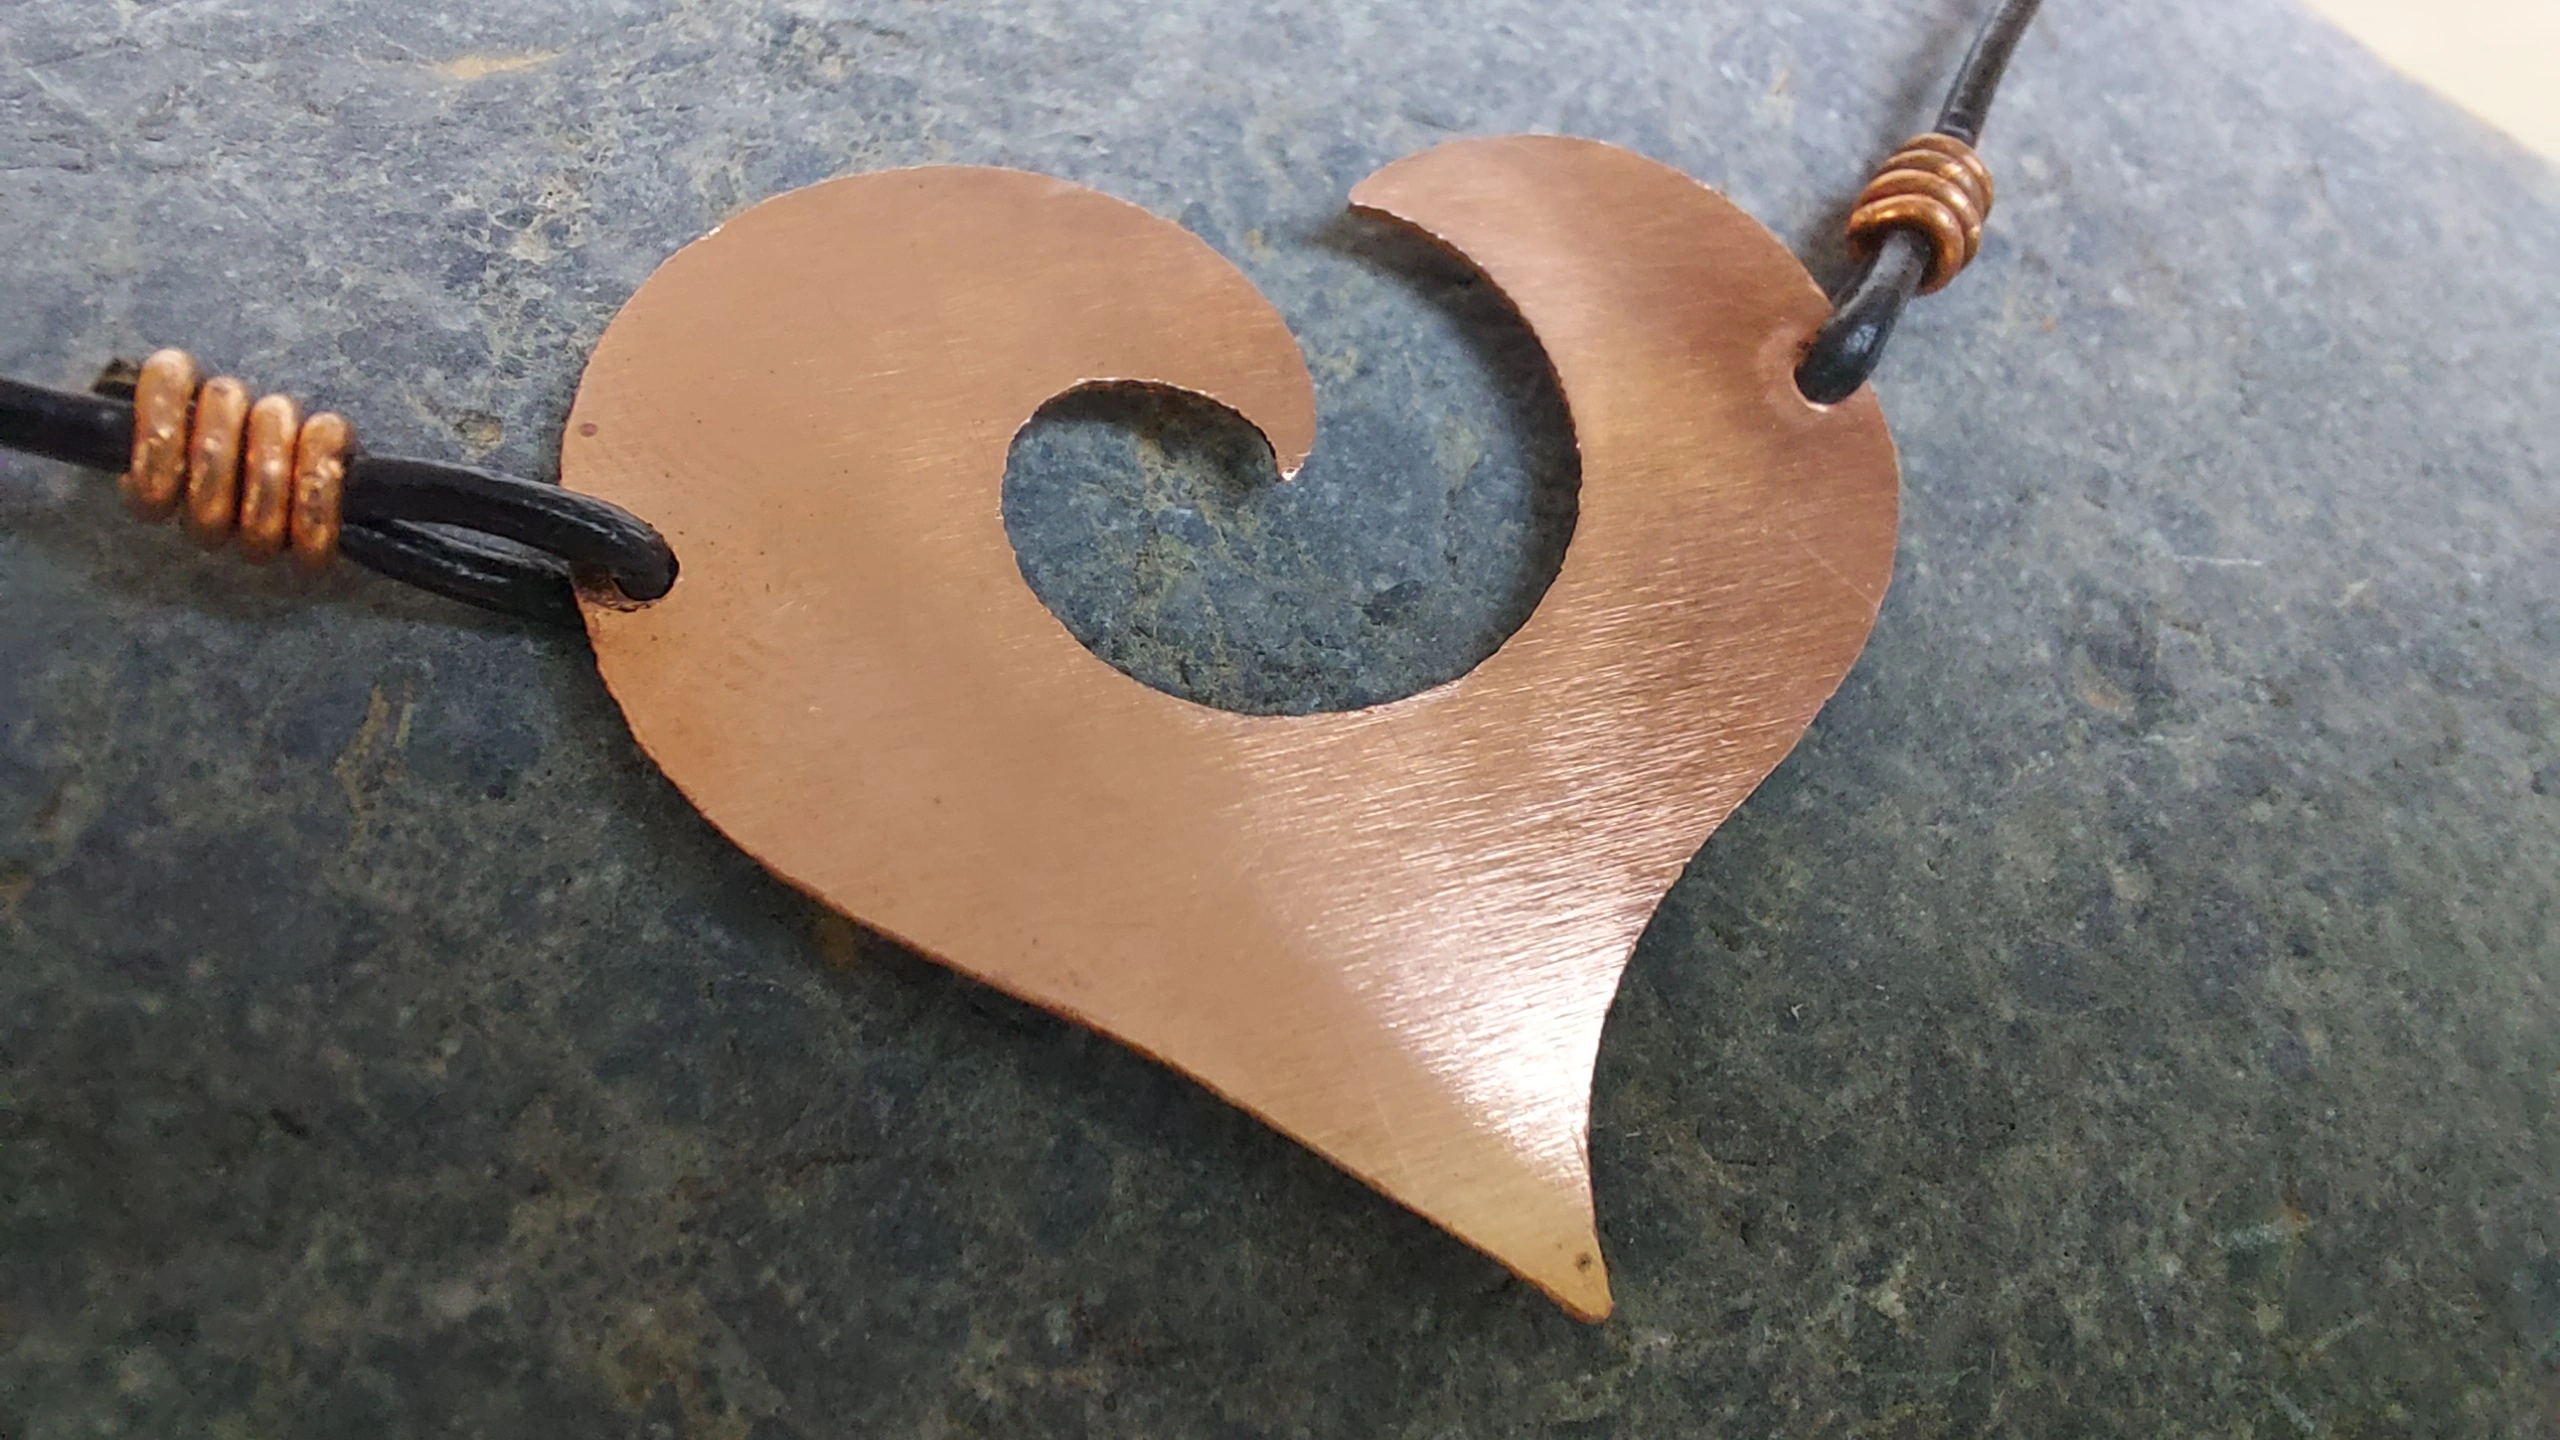
Think of the possibilities: personalized jewelry, bespoke tools, custom electronic prototypes and unique metal decorations, all crafted from the convenience of your workspace.
Transform your everyday 3D printer into a versatile metal etching tool with Liquid Blade 3D.

Simplicity Meets Precision.
Why Bother?
Traditional metalworking tools like CNC machines and laser cutters often come with a hefty price tag and require significant space and specialized knowledge.
Liquid Blade 3D offers a compelling alternative. It leverages your existing 3D printer, transforming it into a precise metal etching system without the need for expensive machinery or hazardous chemicals.
The add-on is designed for easy installation and seamless integration, allowing you to switch between 3D printing and metal etching with minimal effort.
Compatible
Our system can be integrated on every 3D Printer machine
Easy to Install
The system takes 10 minutes to attach or detach from the printer.
No Heat, No Smoke
The process of cutting metal makes no smoke, no high heat or loud sound.
Easy to use
There is nothing to learn. Like any other 3D printing project, load the file and cut!
Wide Range of Options
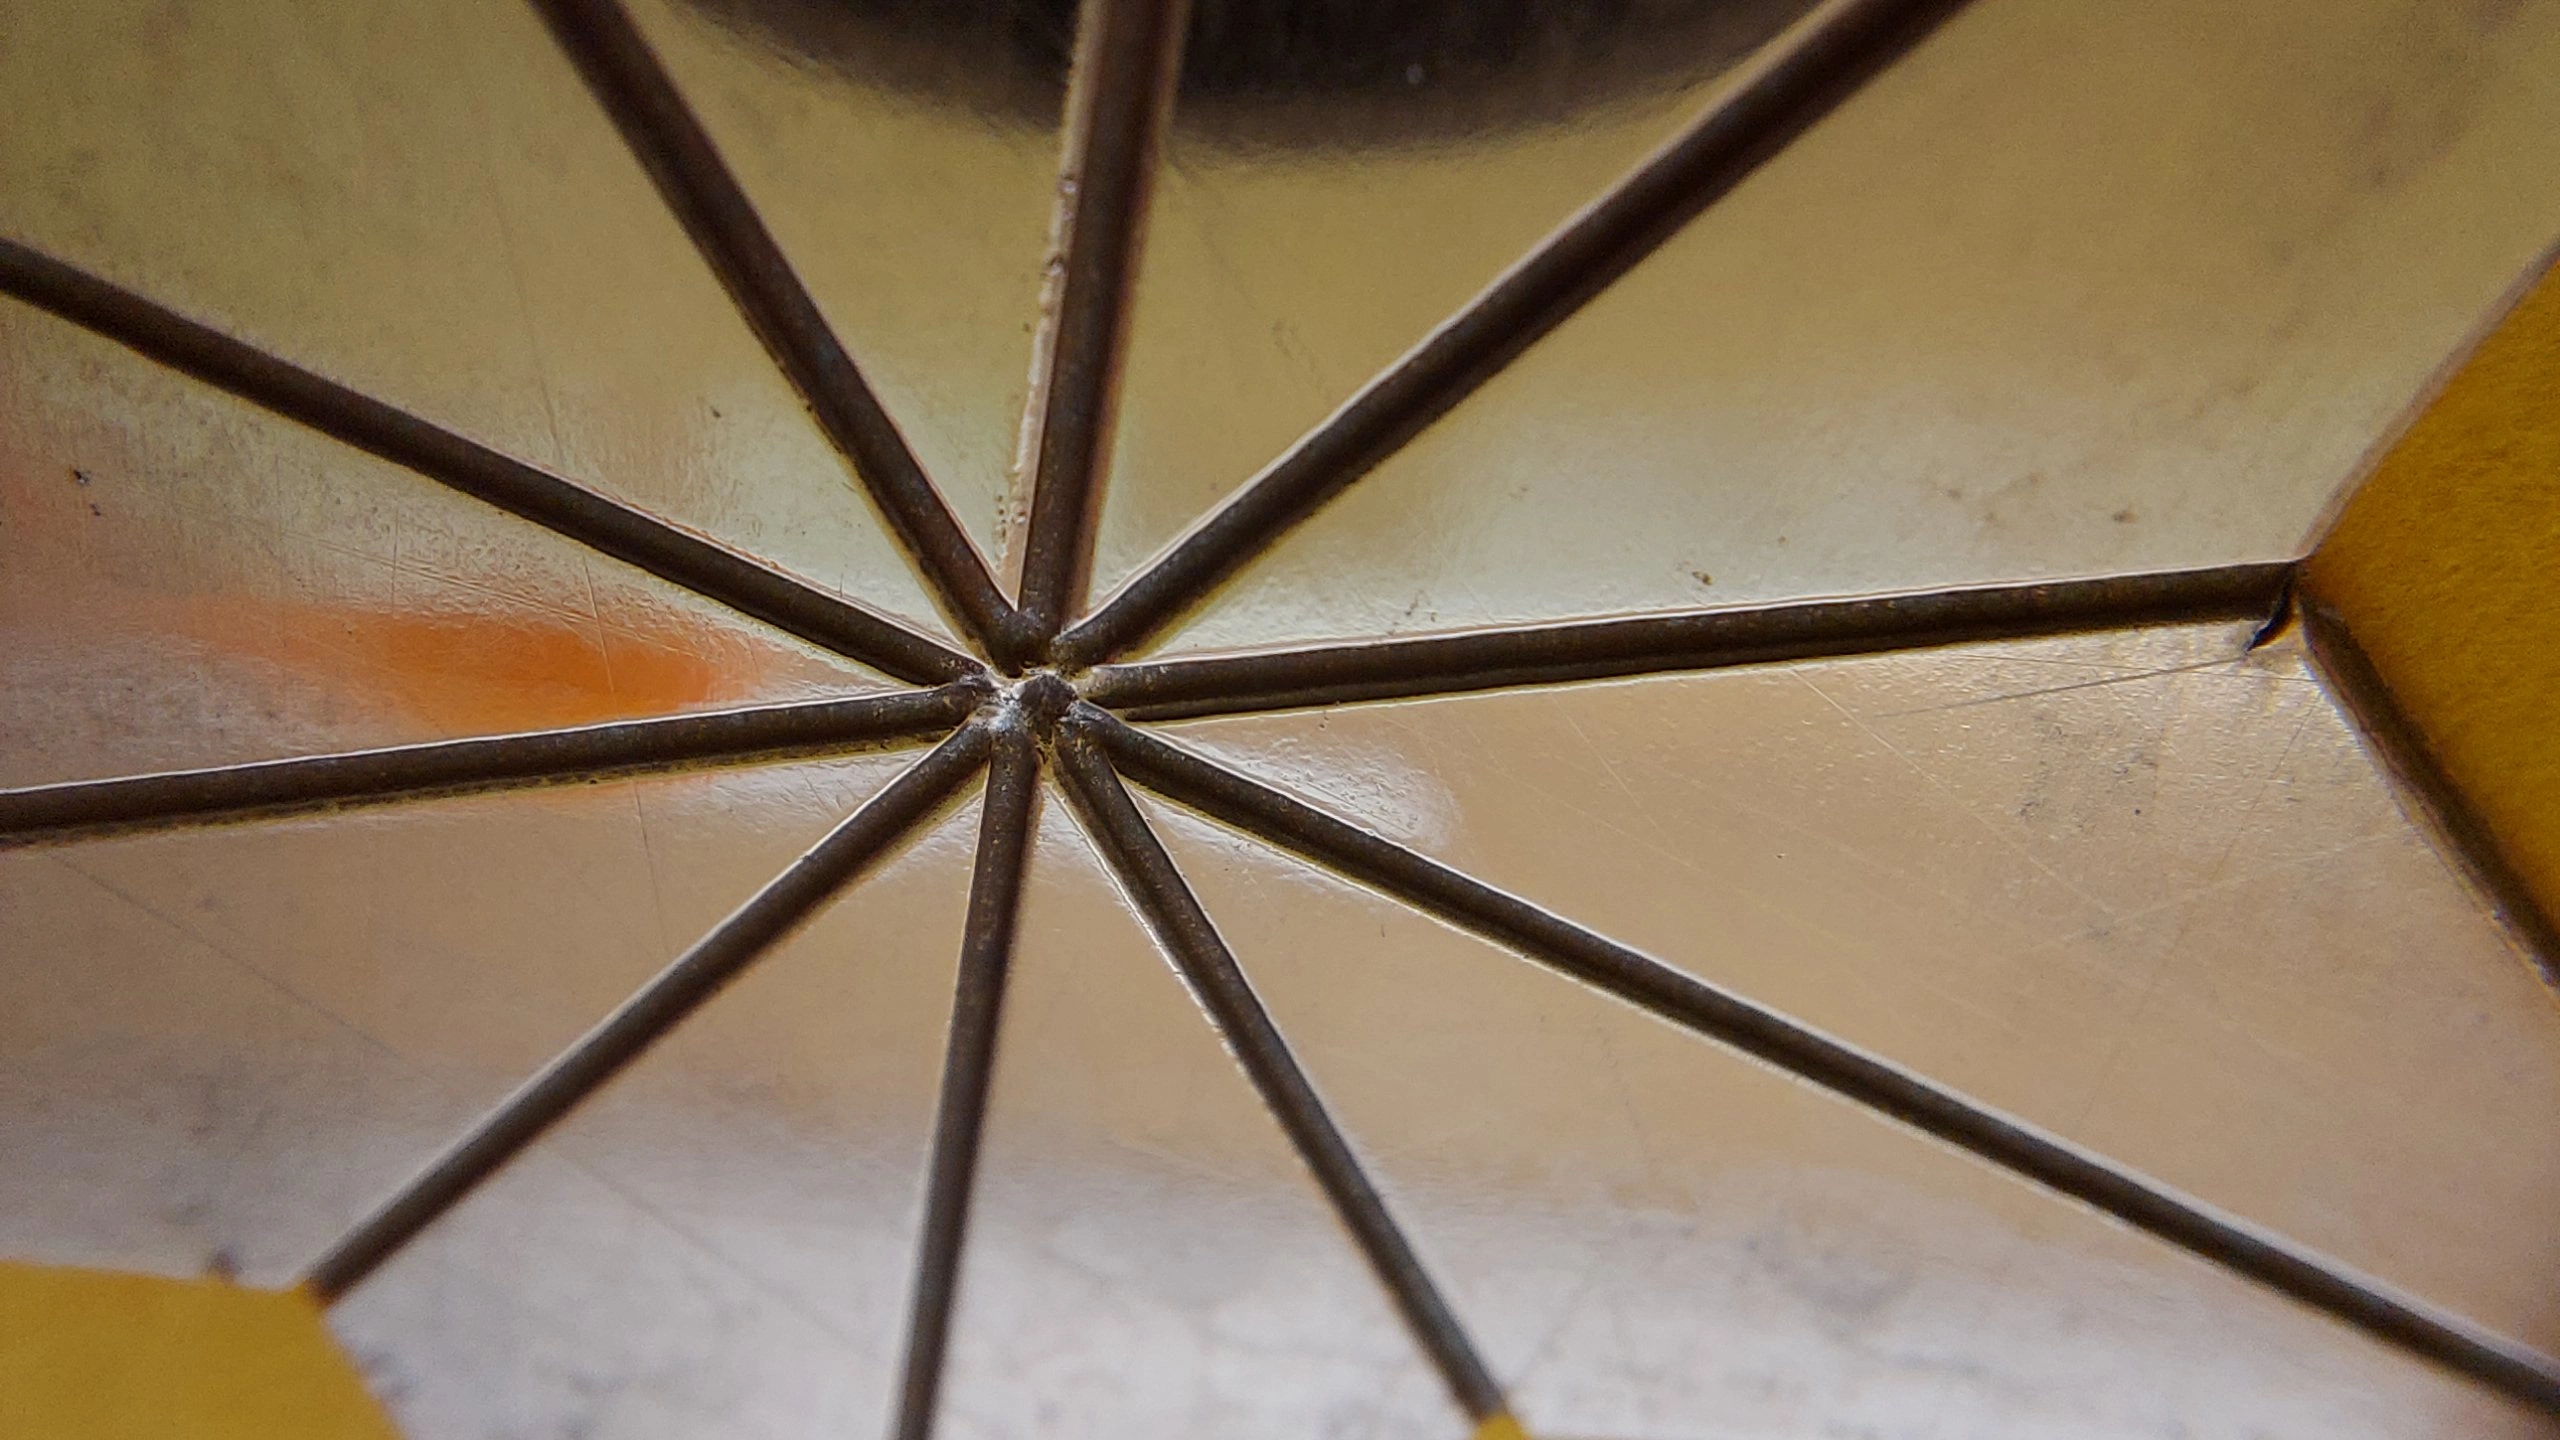
You can cut copper, zinc, gold, iron and all conductive metals.
This flexibility allows you to prototype and experiment rapidly, all while saving time and money!
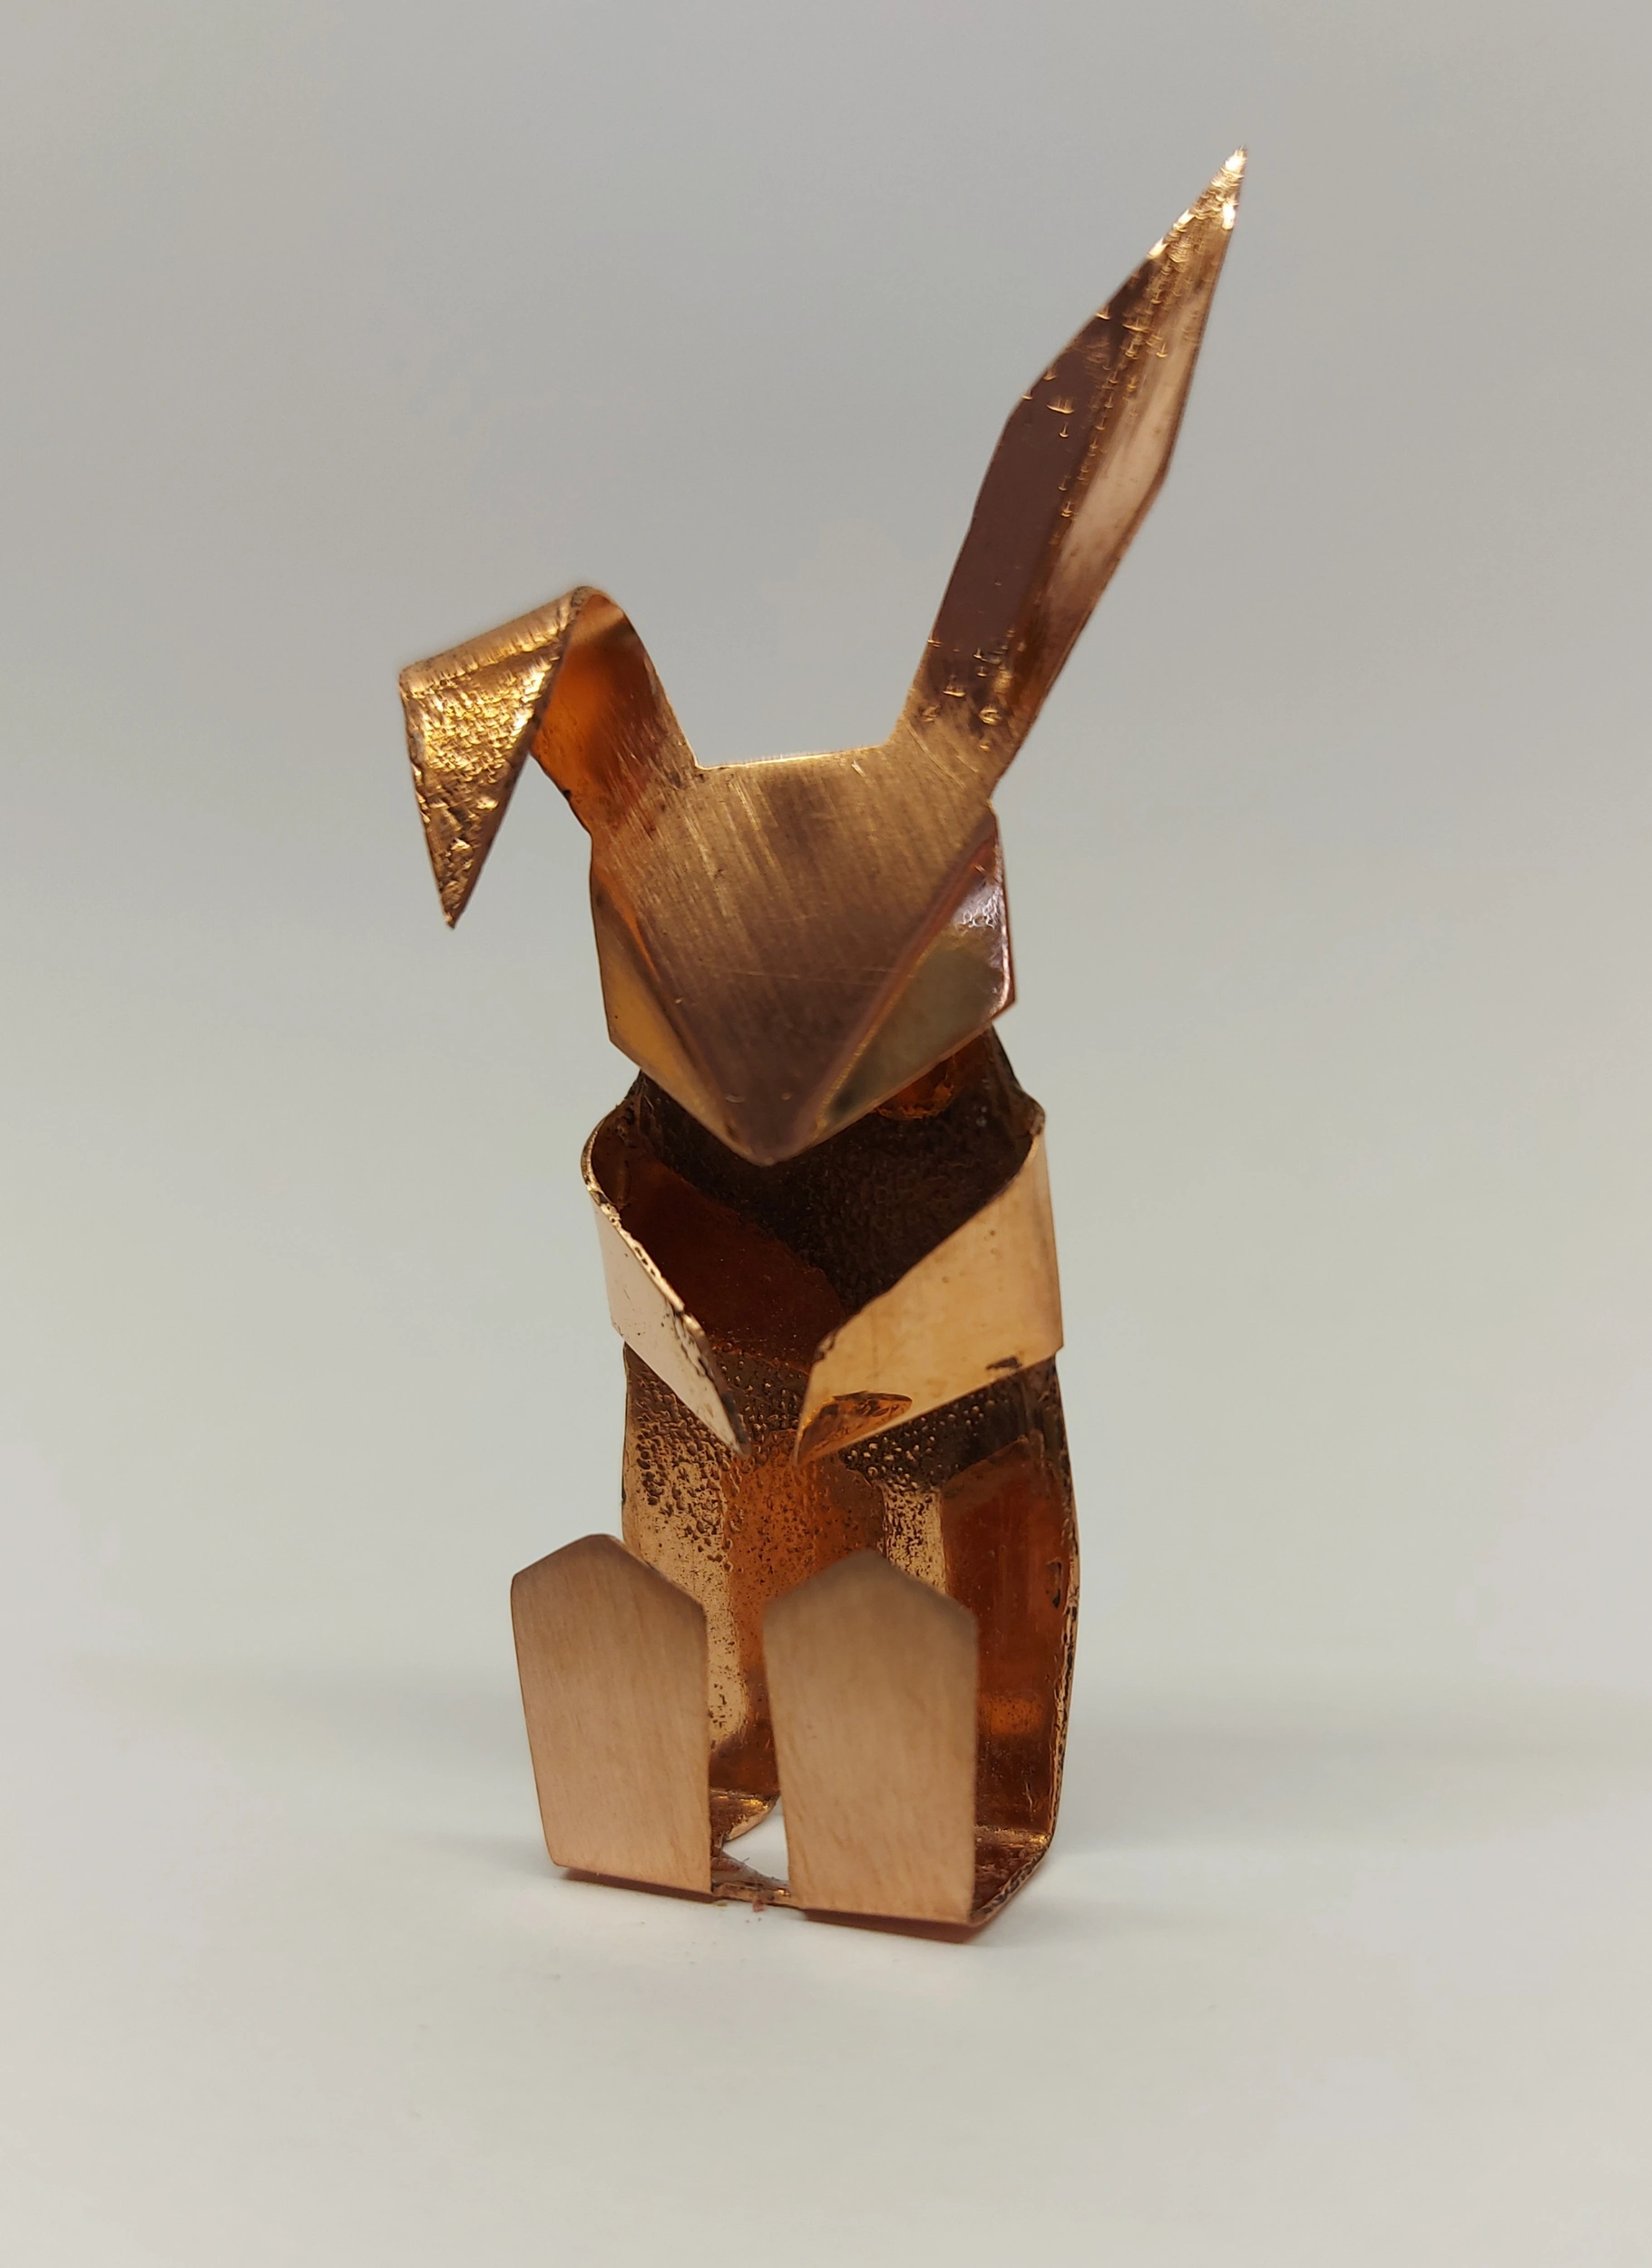
Unleash your Creativity.
Real-world Applications
Liquid Blade 3D opens up a world of creative possibilities. Here are just a few examples of what you can create:
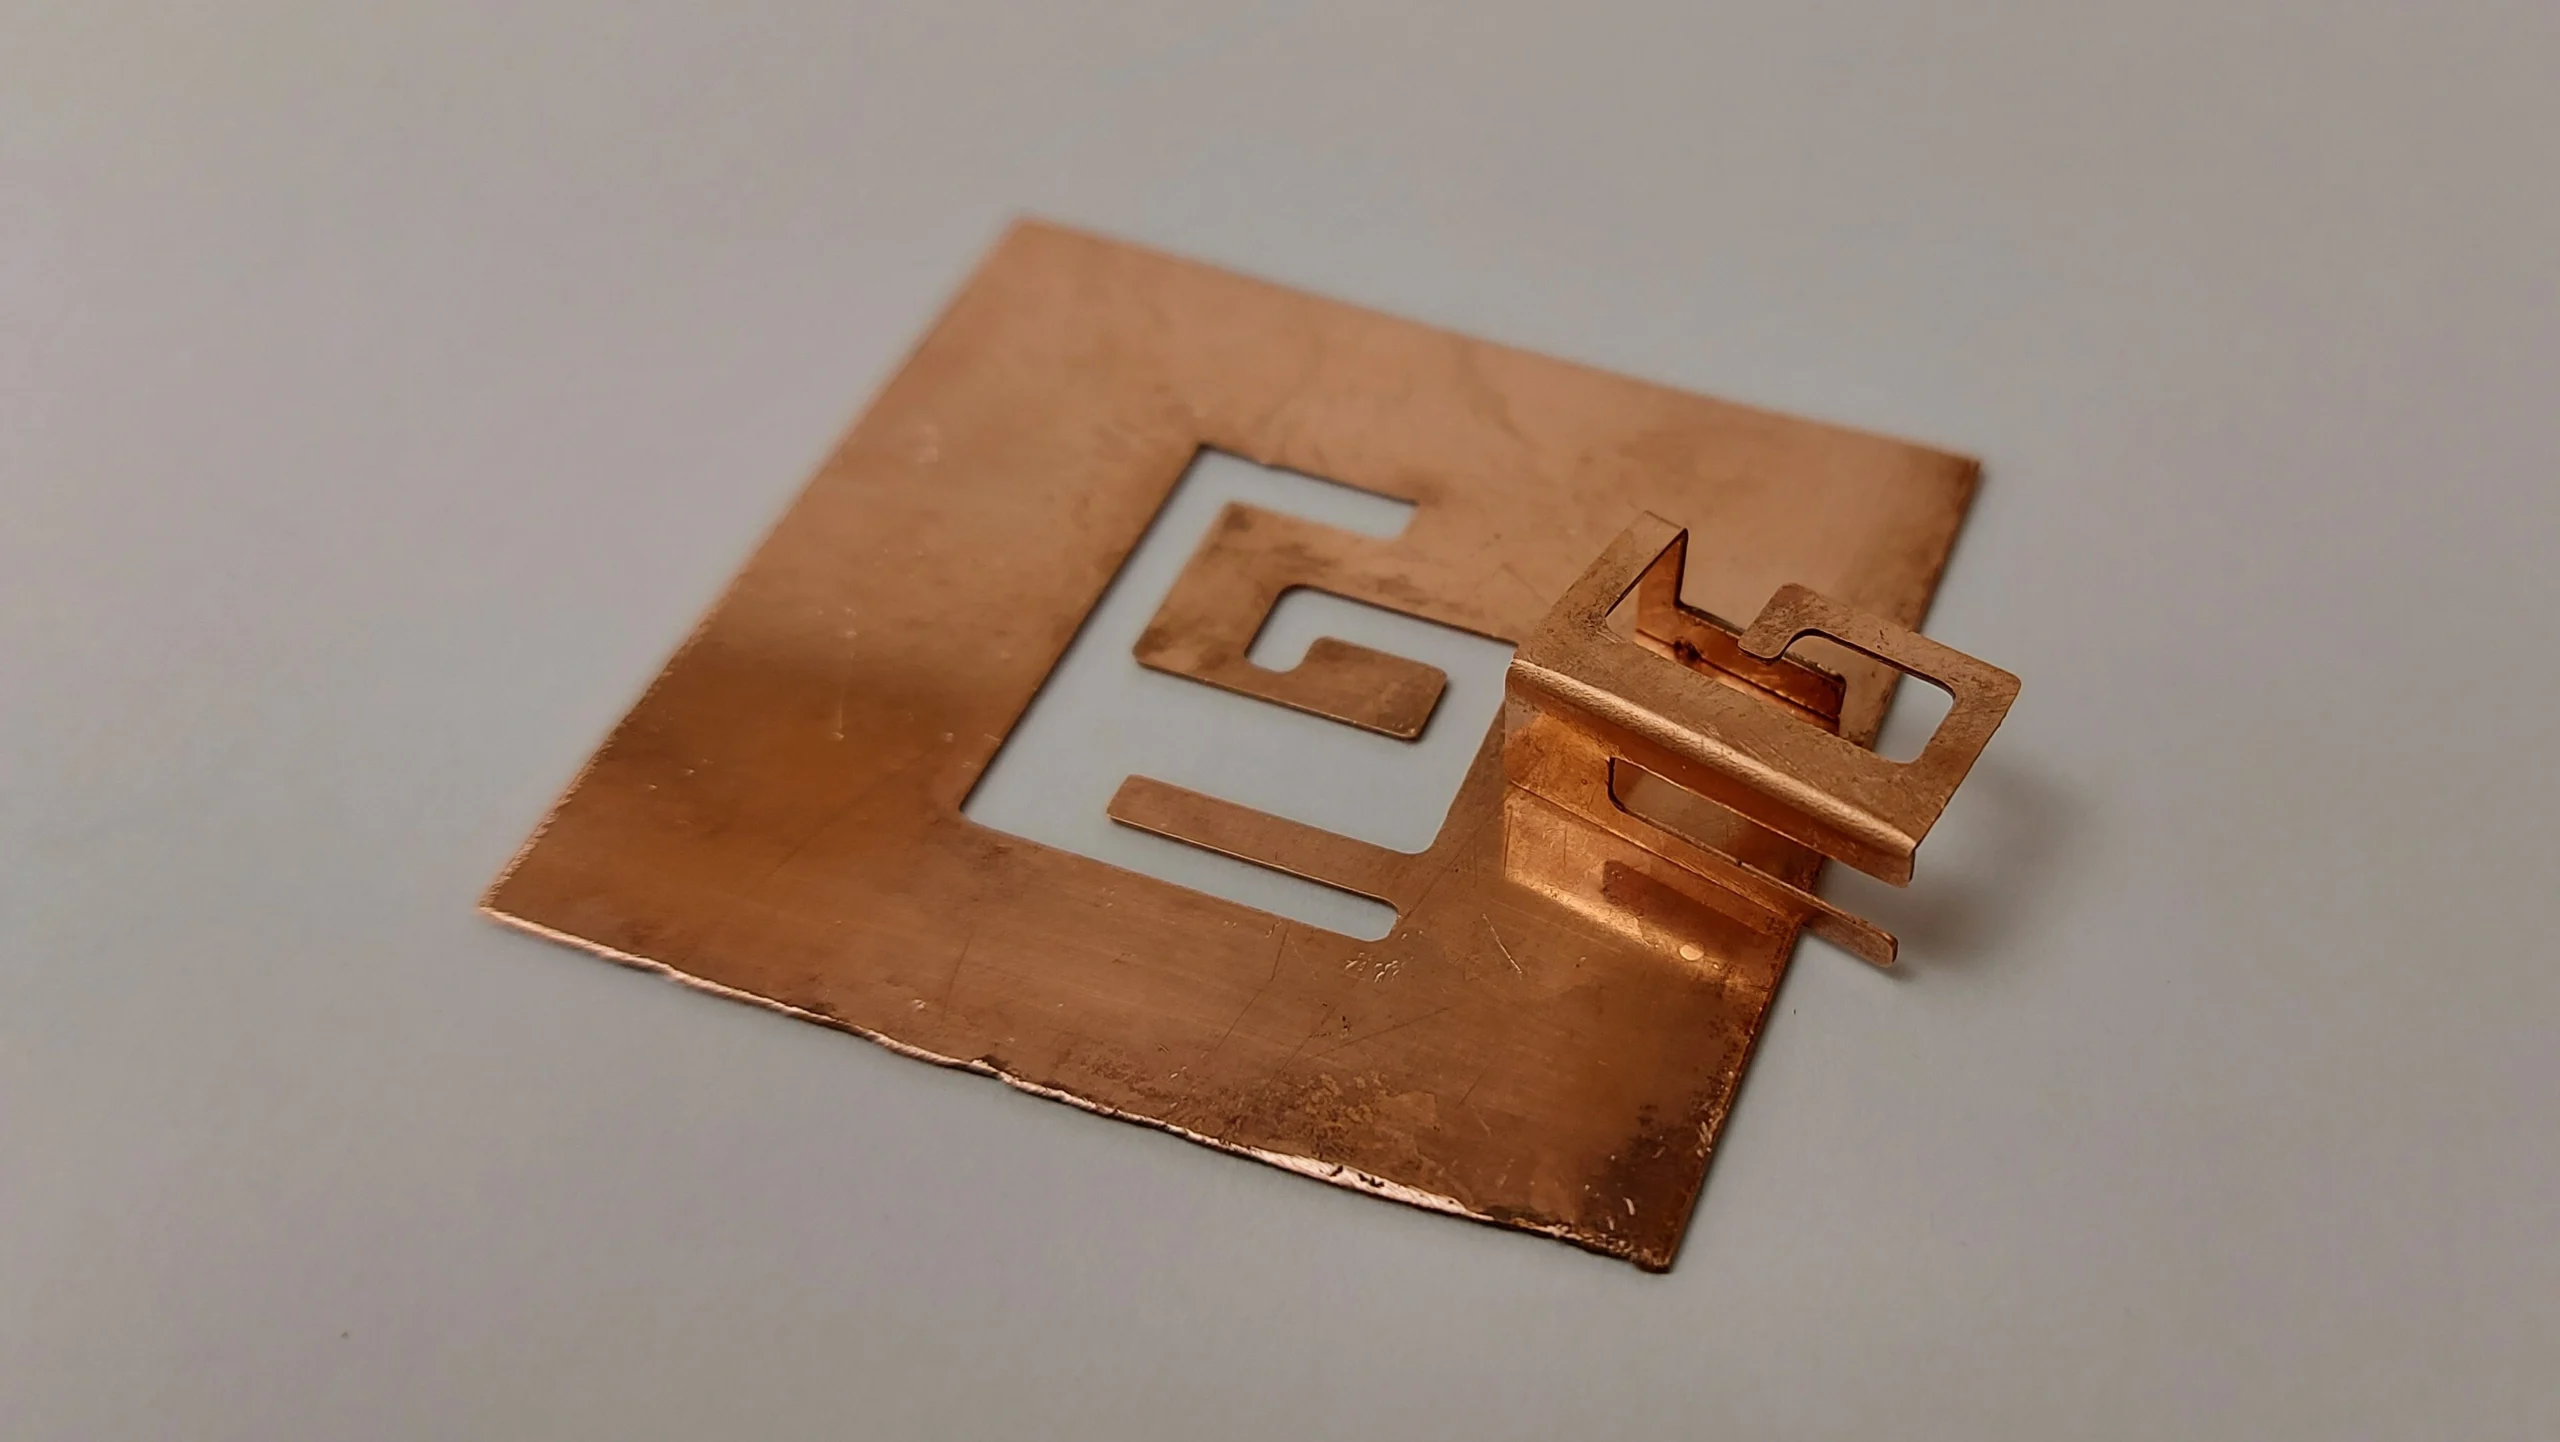
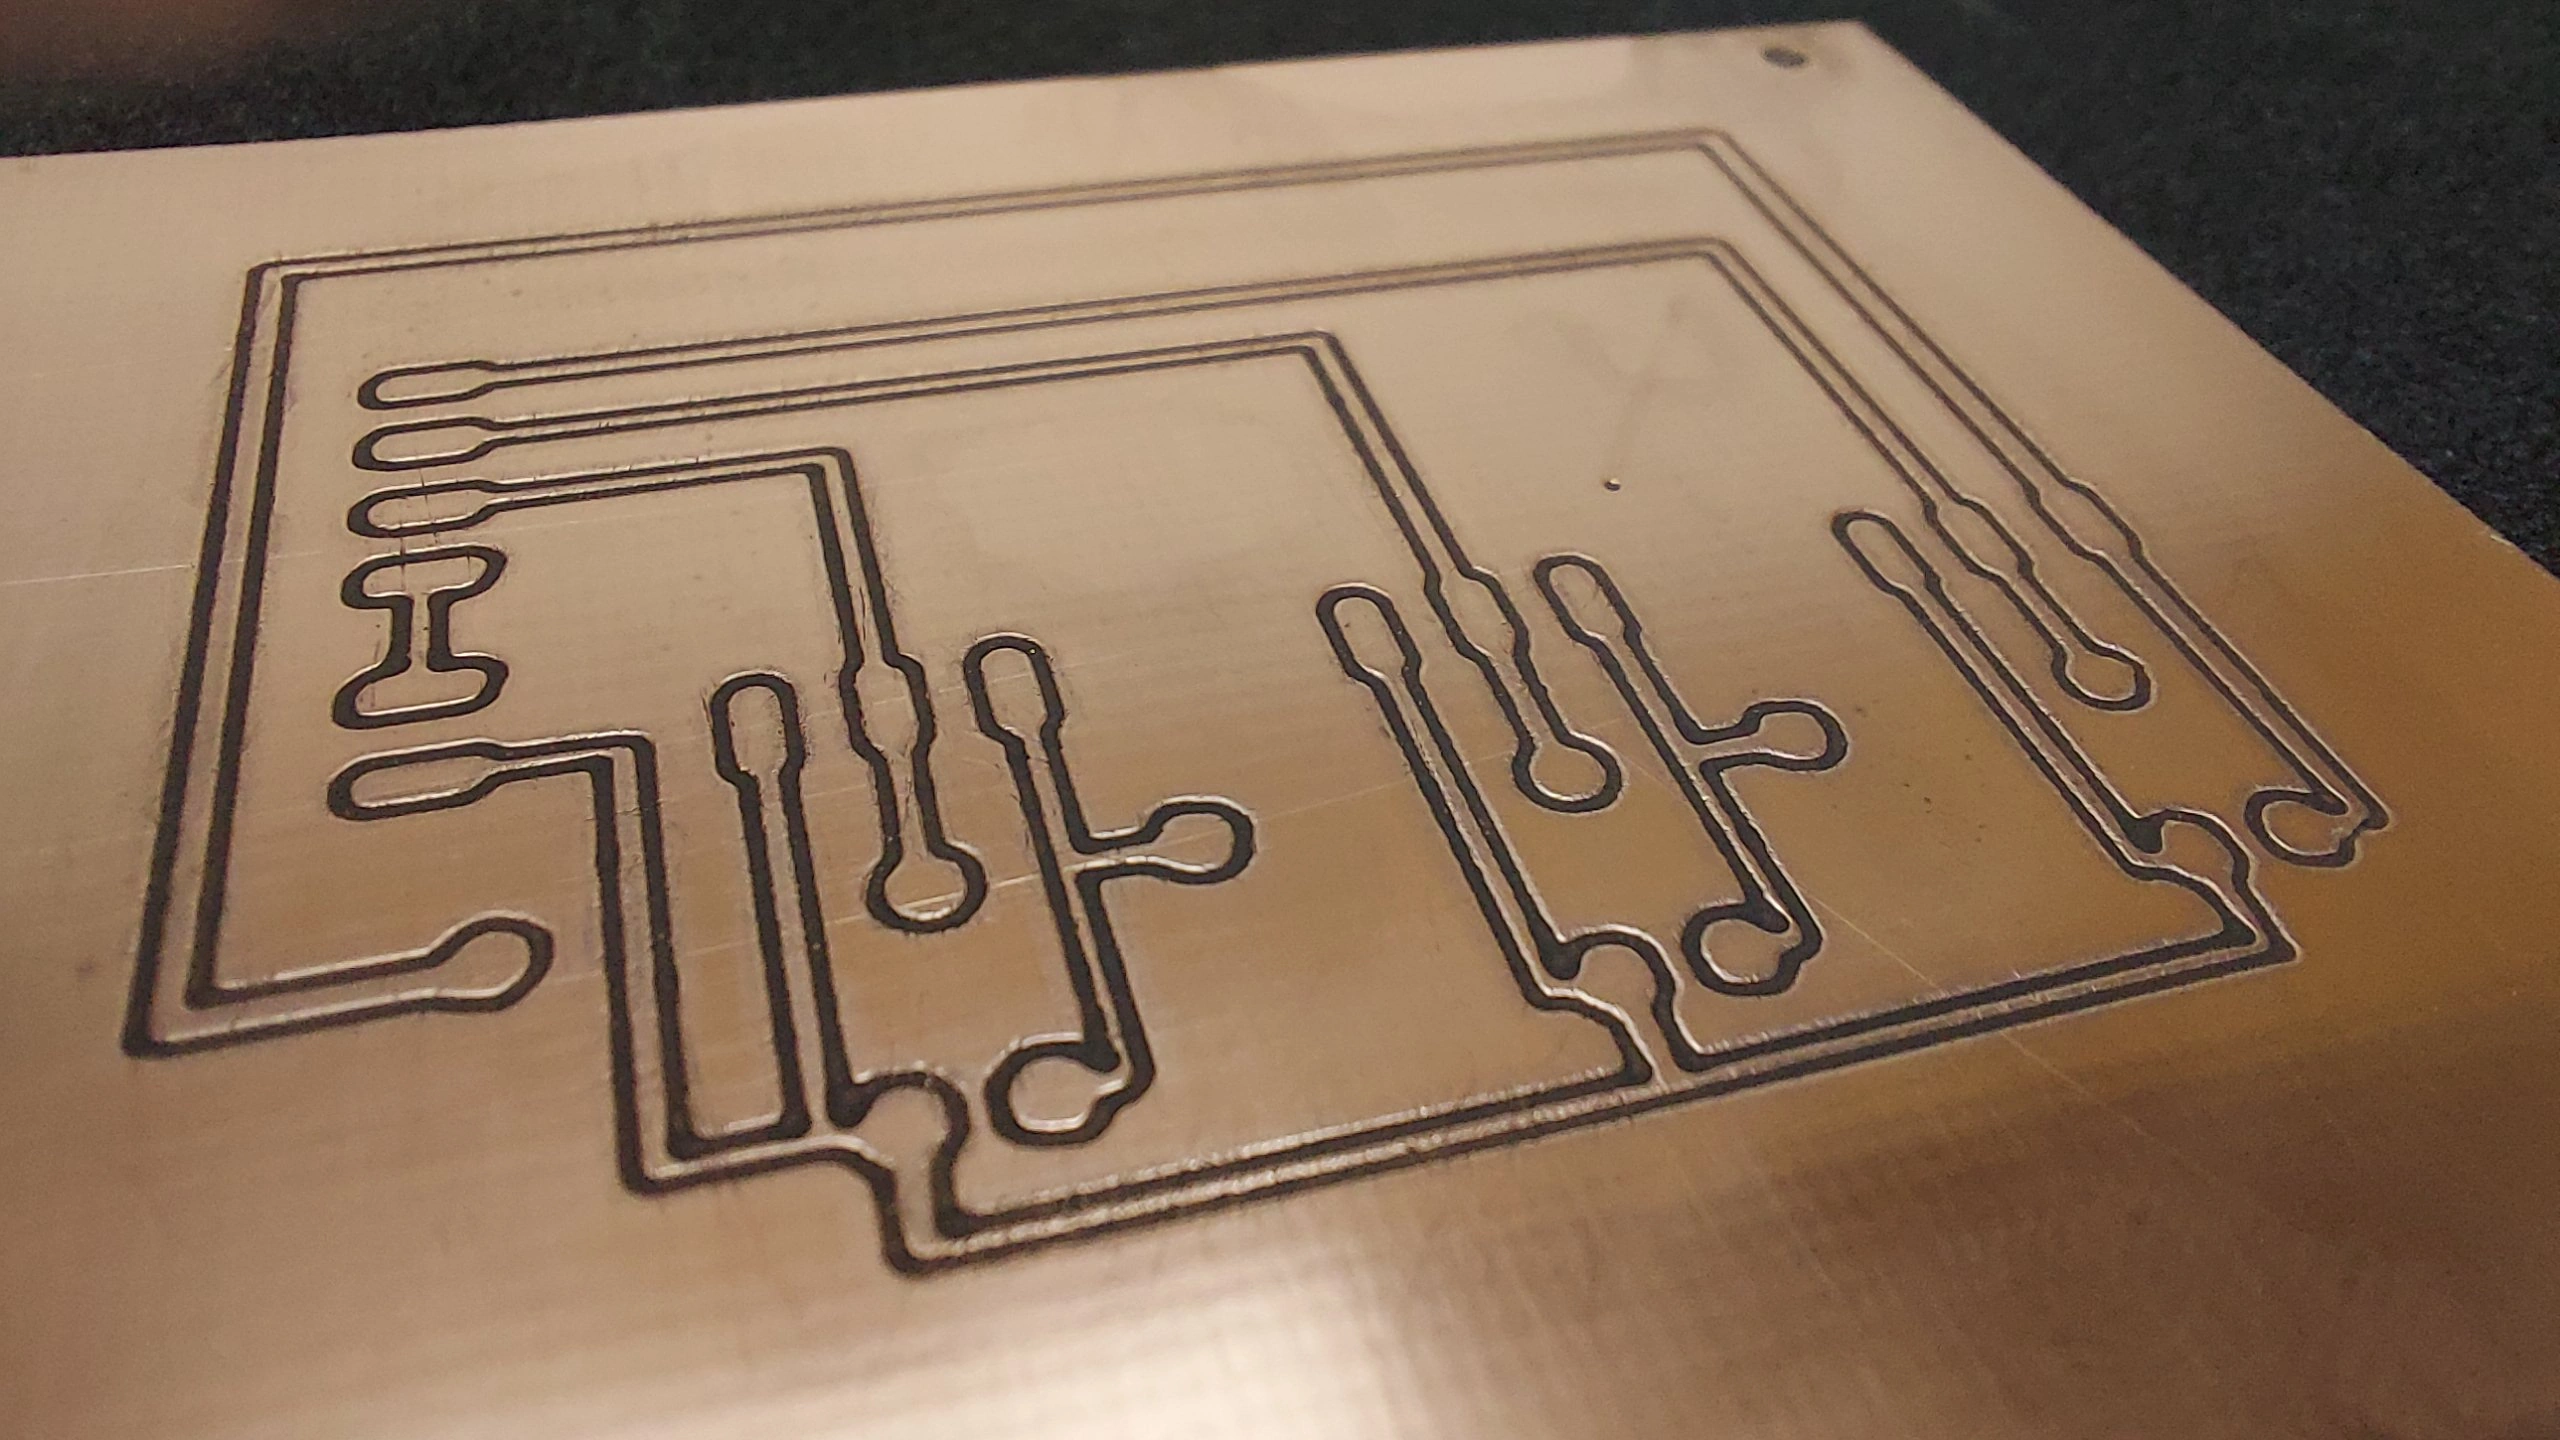
- Design and etch your own single-sided, flex, and IMS PCBs, eliminating the need for costly and time-consuming external fabrication.
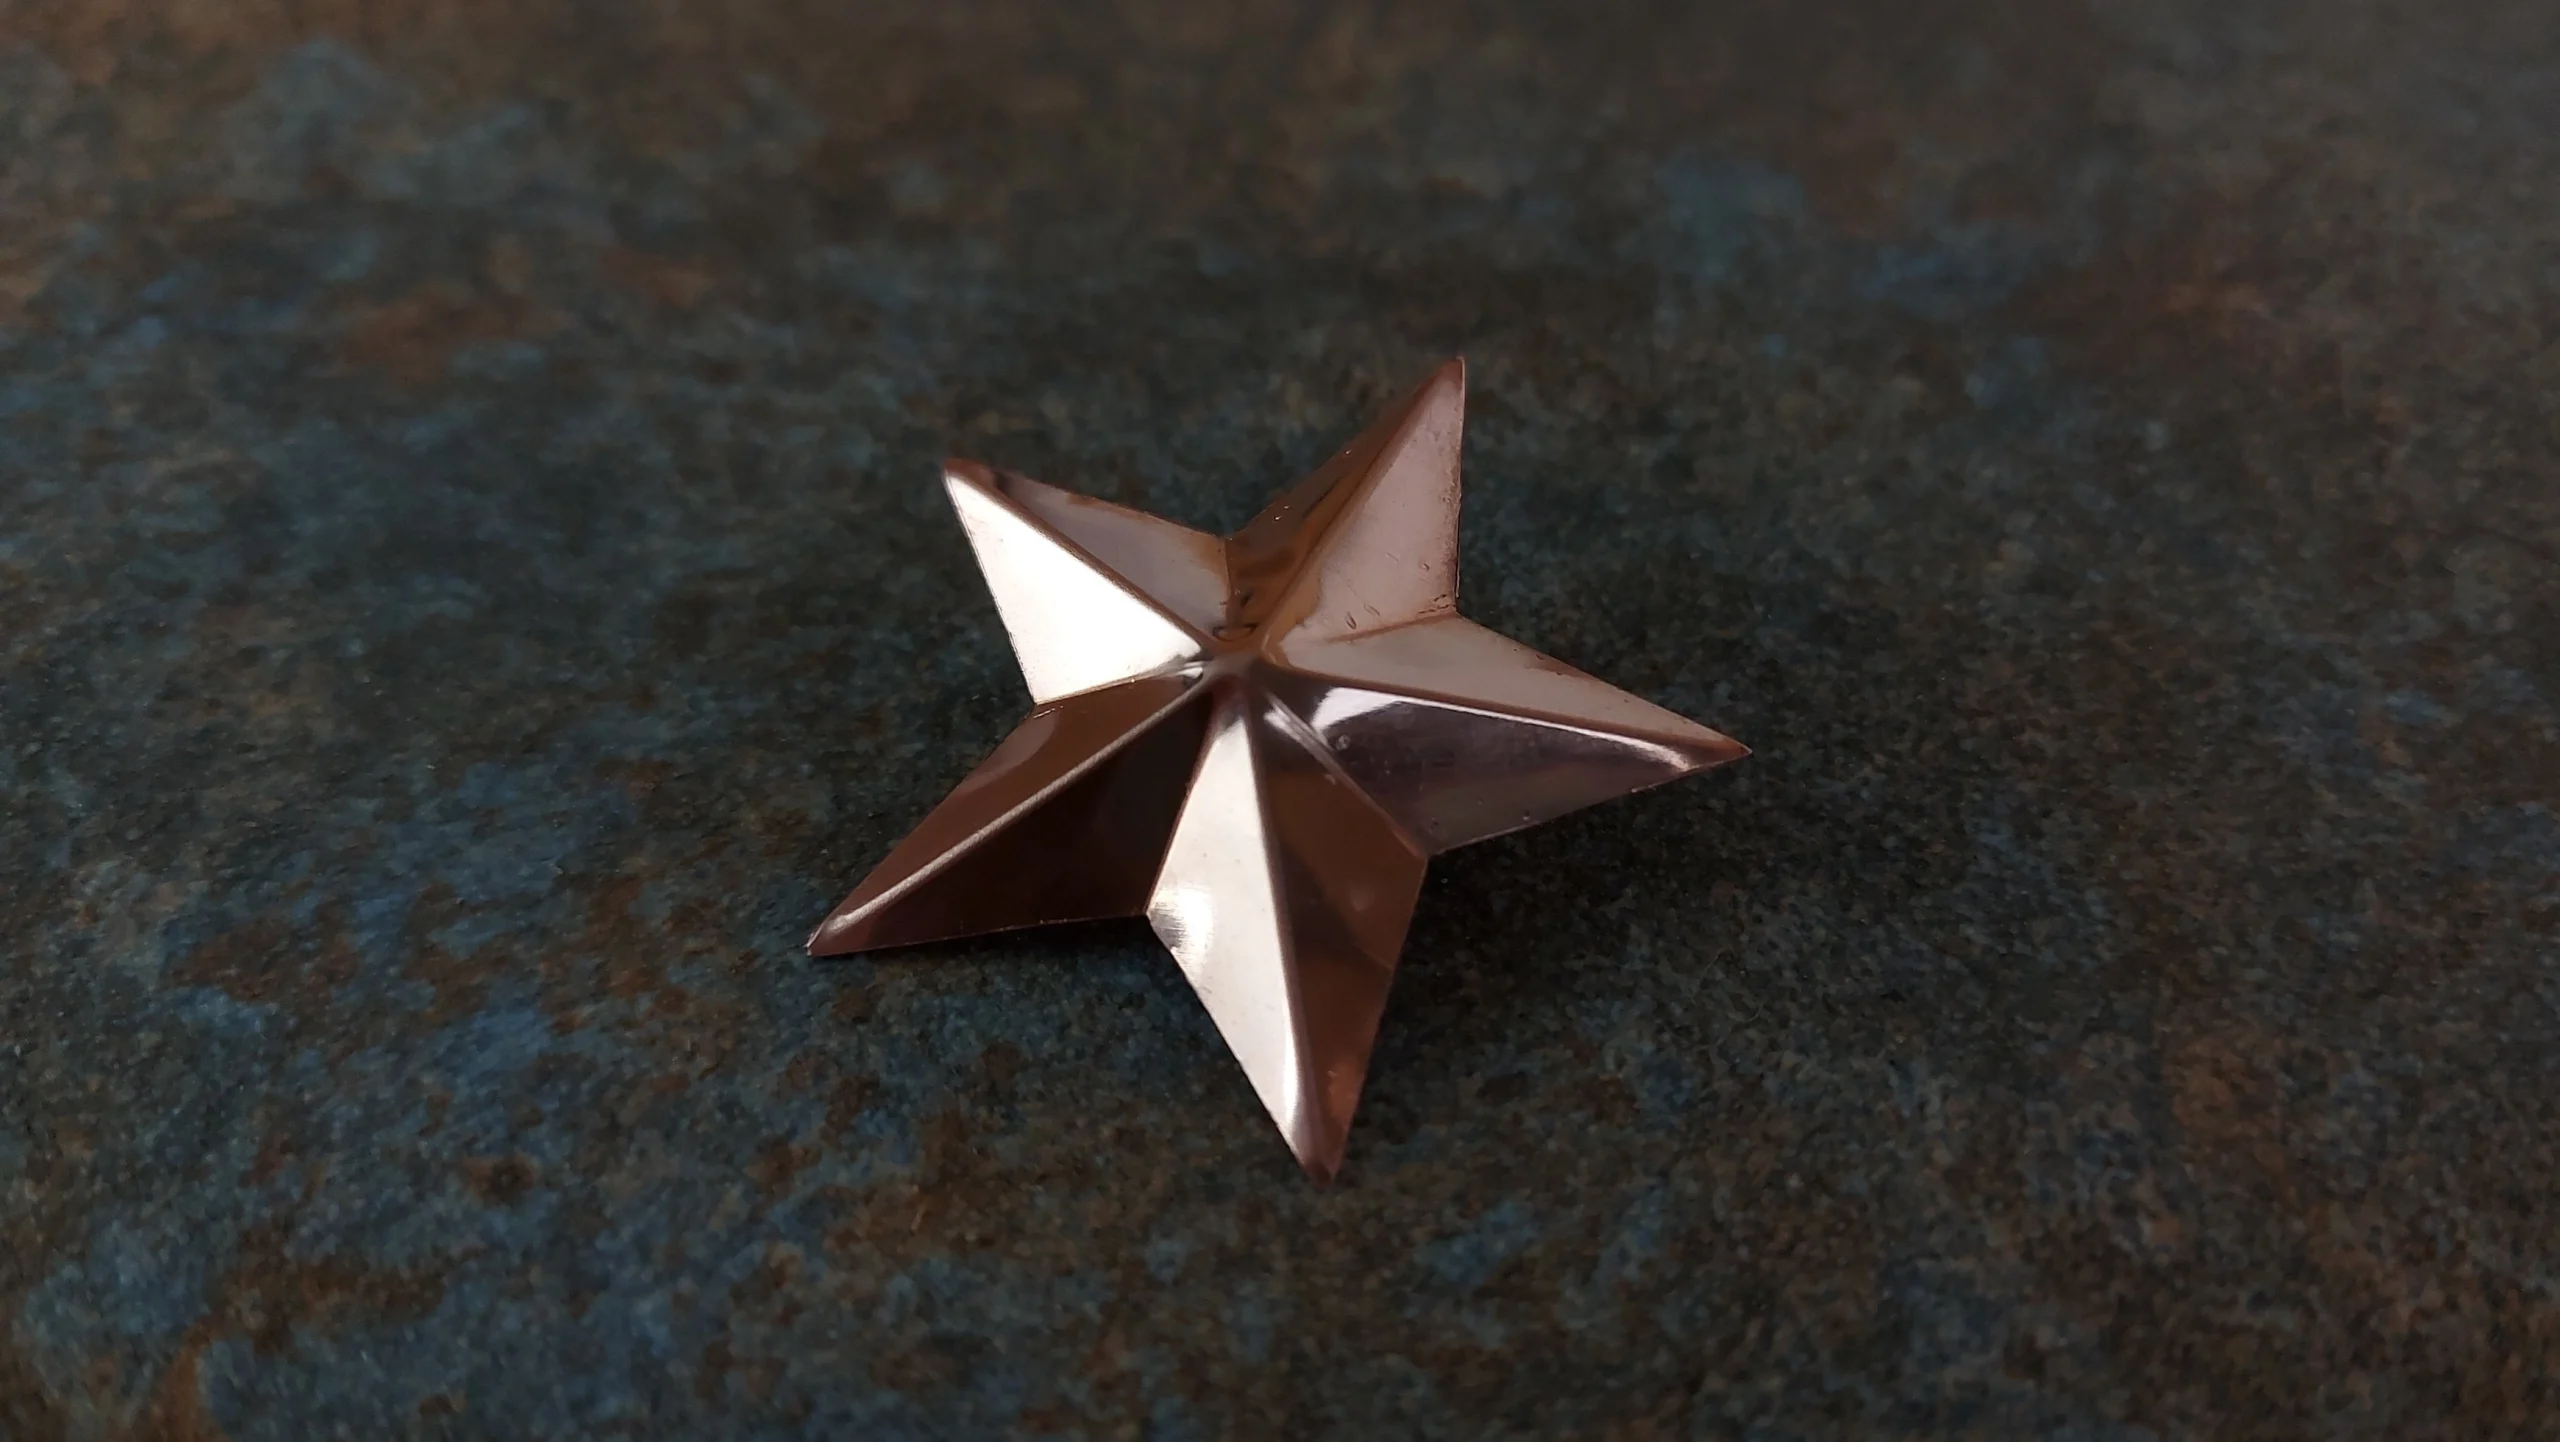
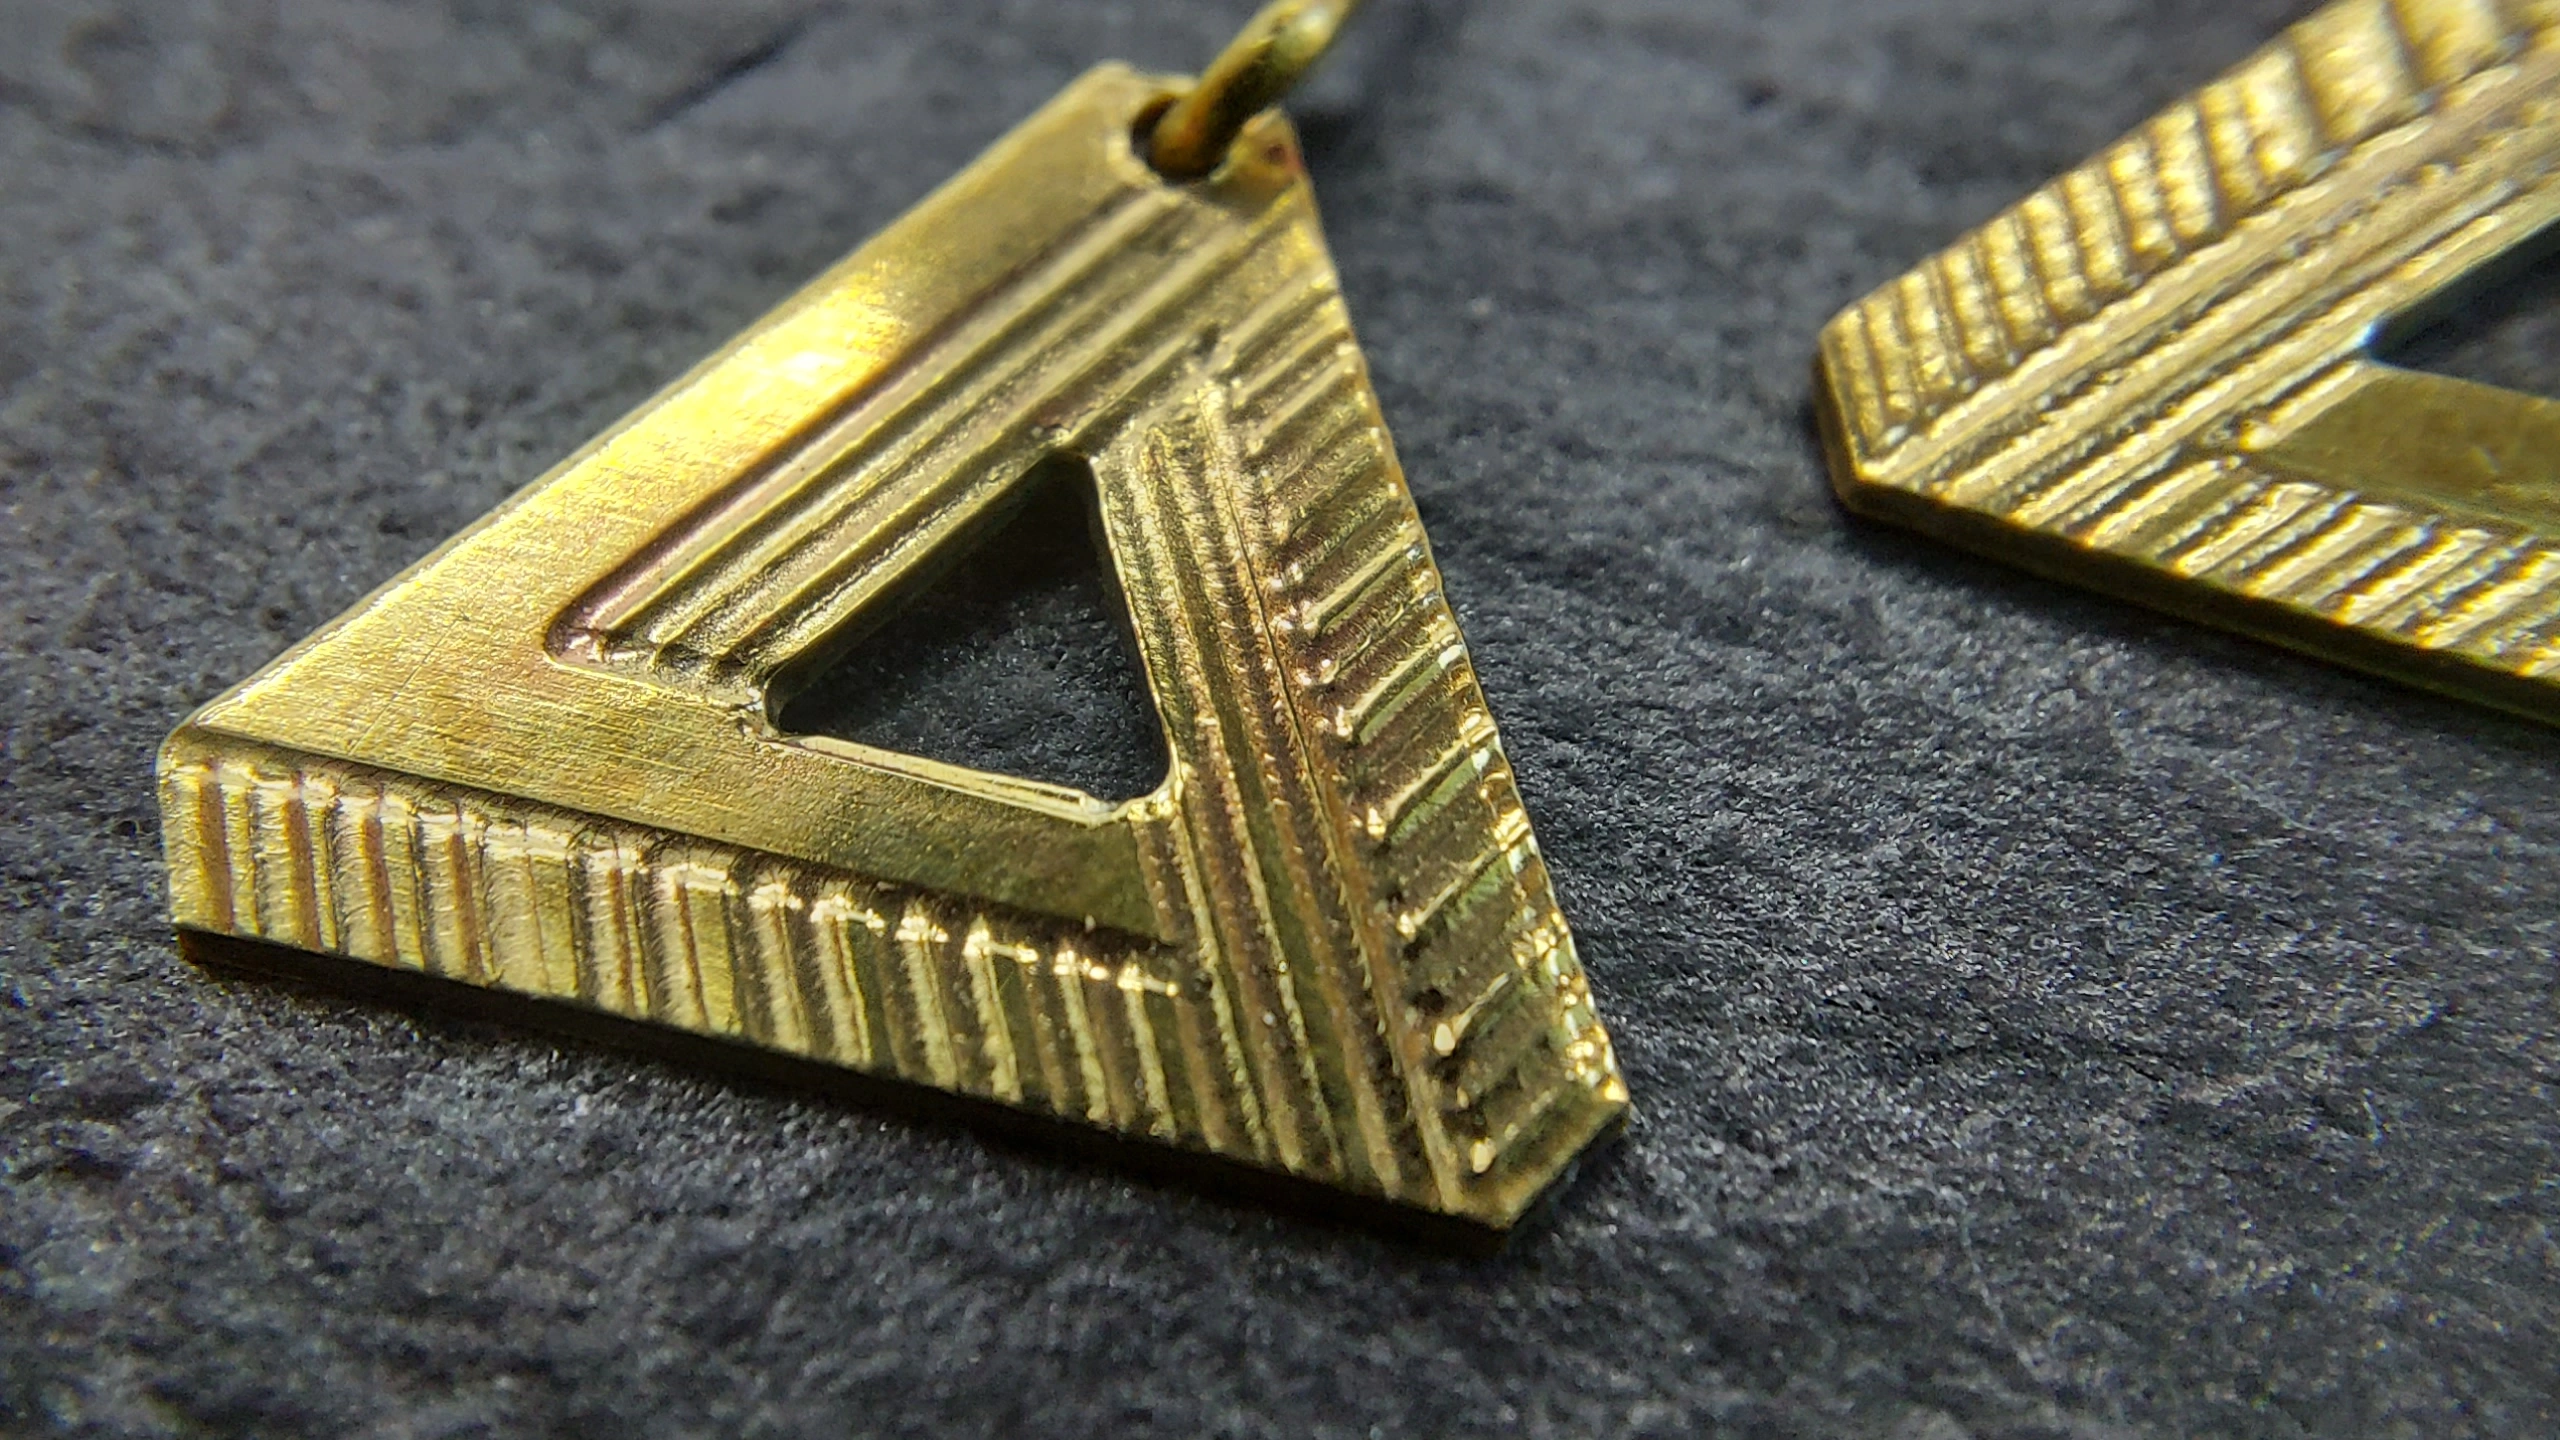
Unique Jewelry and Accessories
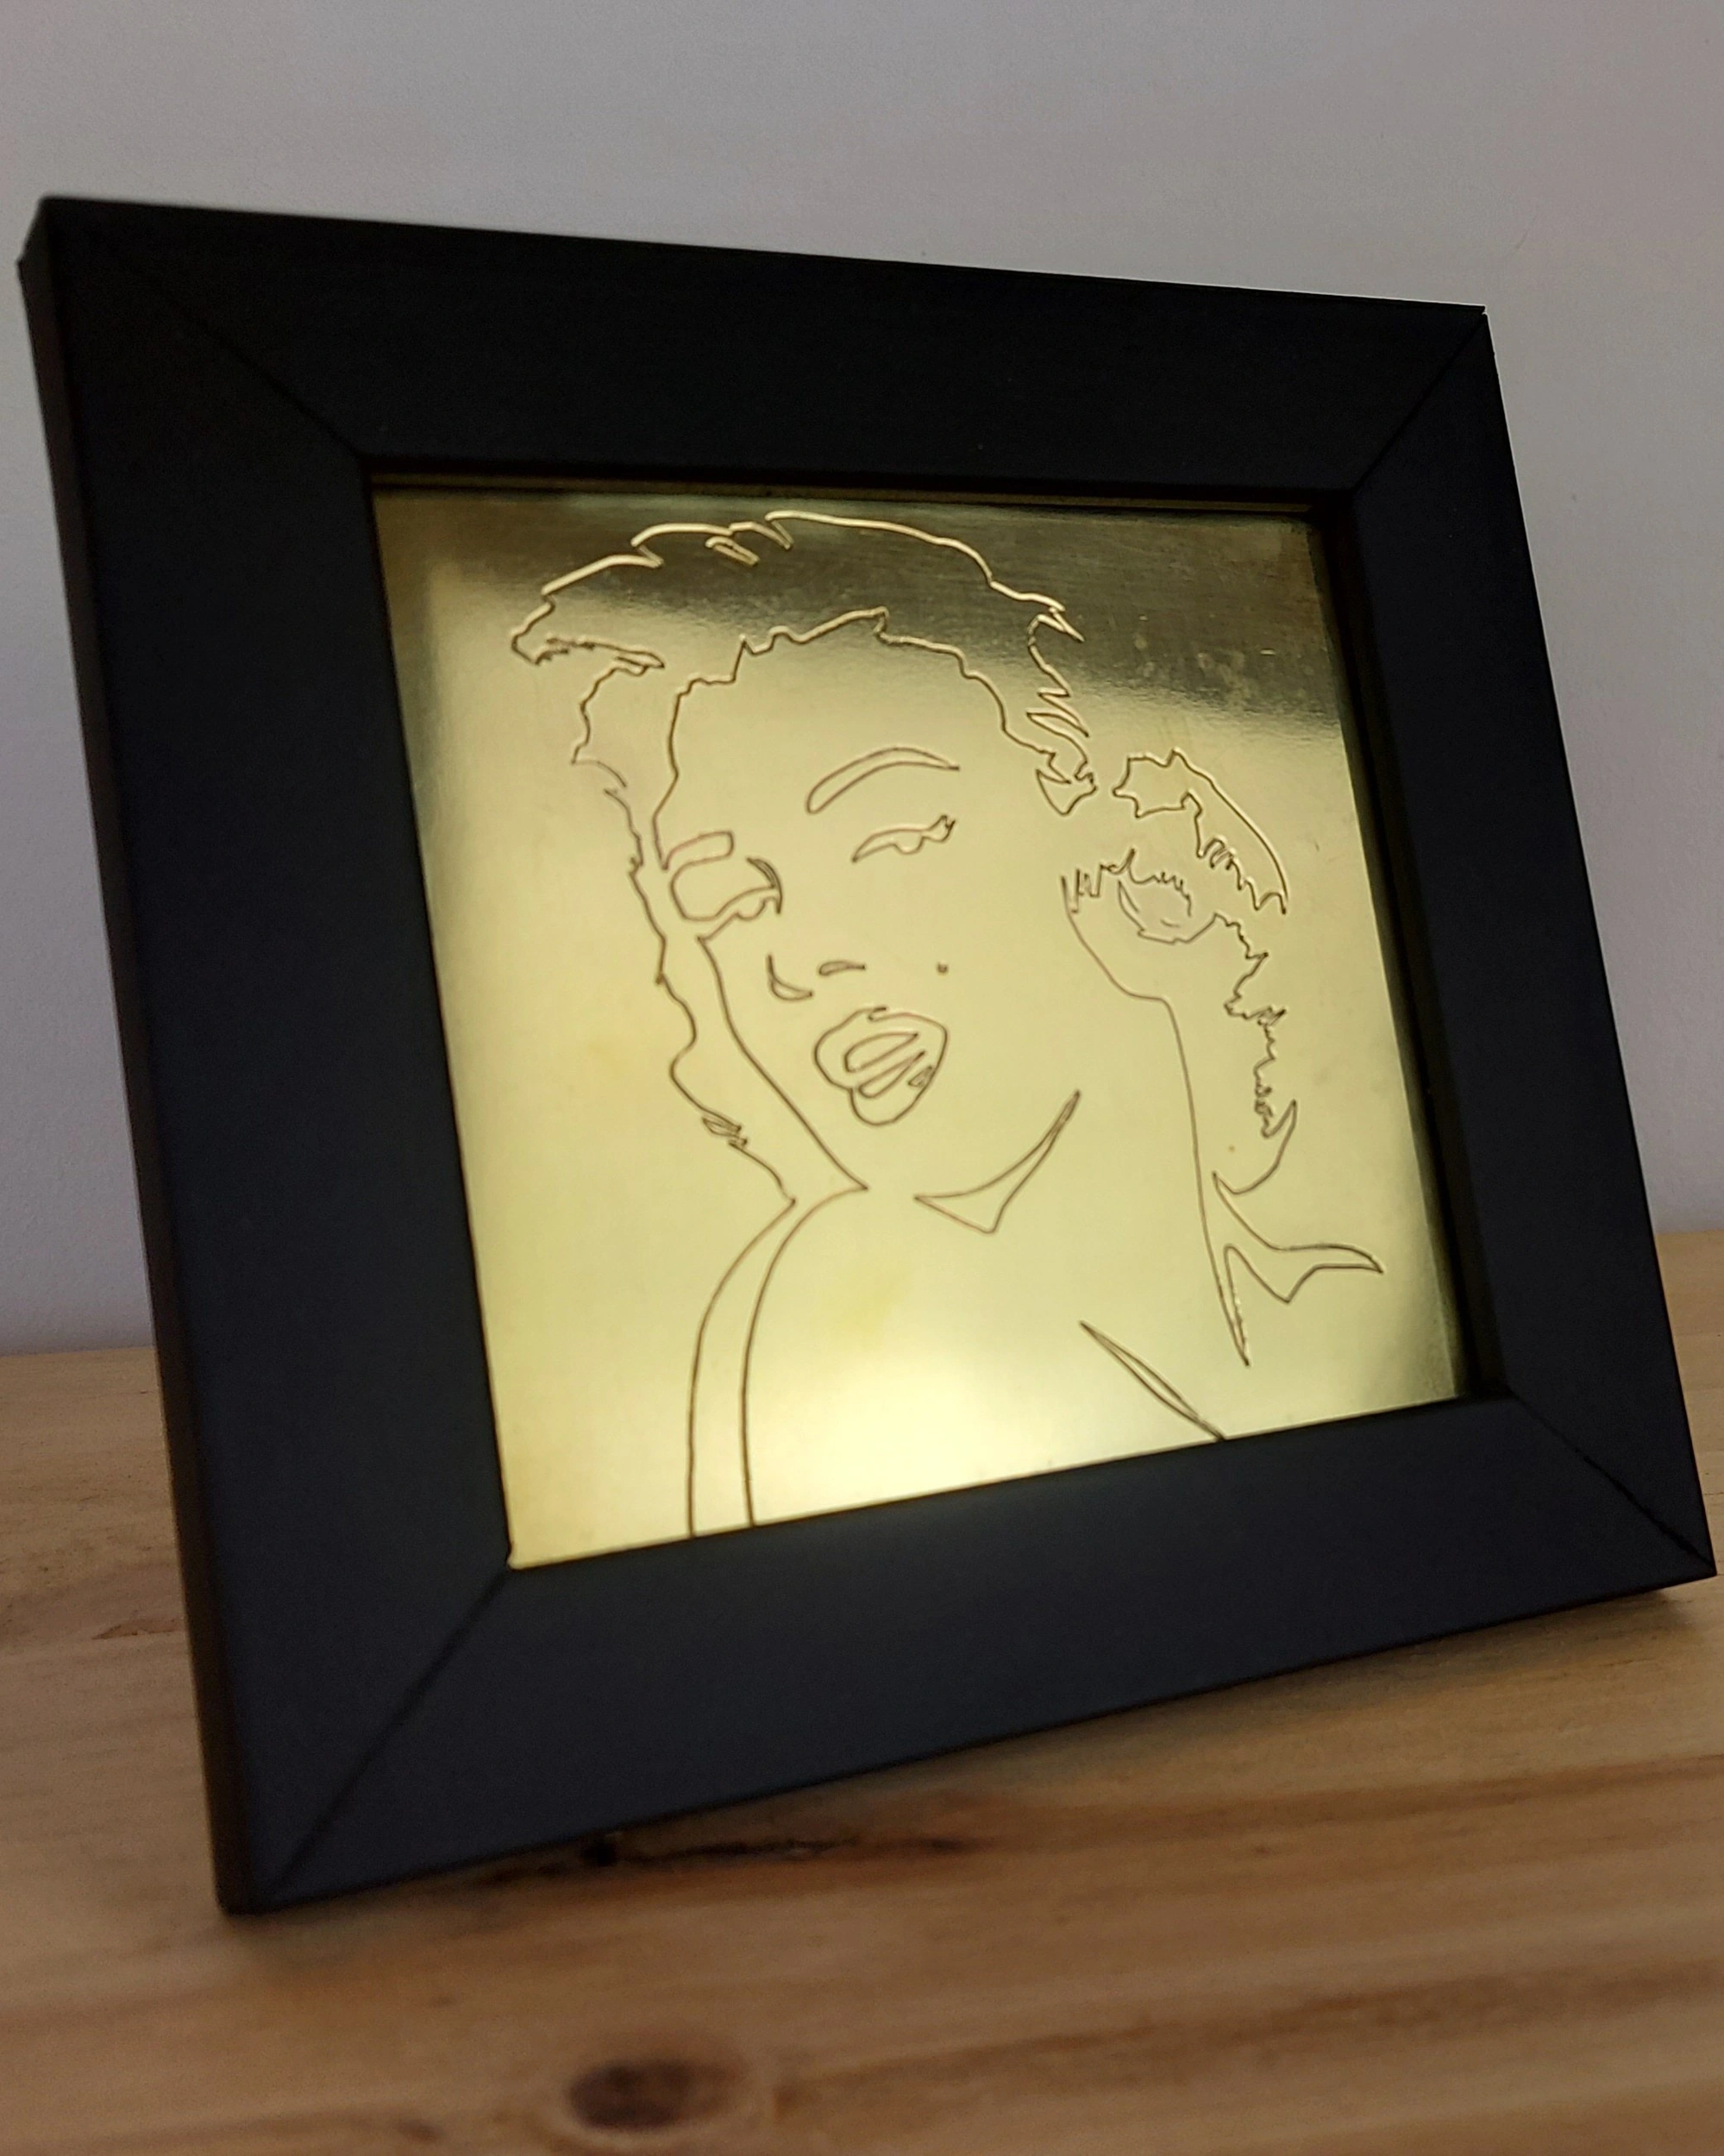
Craft personalized pendants, rings, earrings, and other metal accessories with intricate designs and precise detailing.Detailed Metal Art and Sculptures
Transform your digital designs into tangible metal creations, adding a new dimension to your artistic expression.RF Shields and Antennas for Electronic Devices
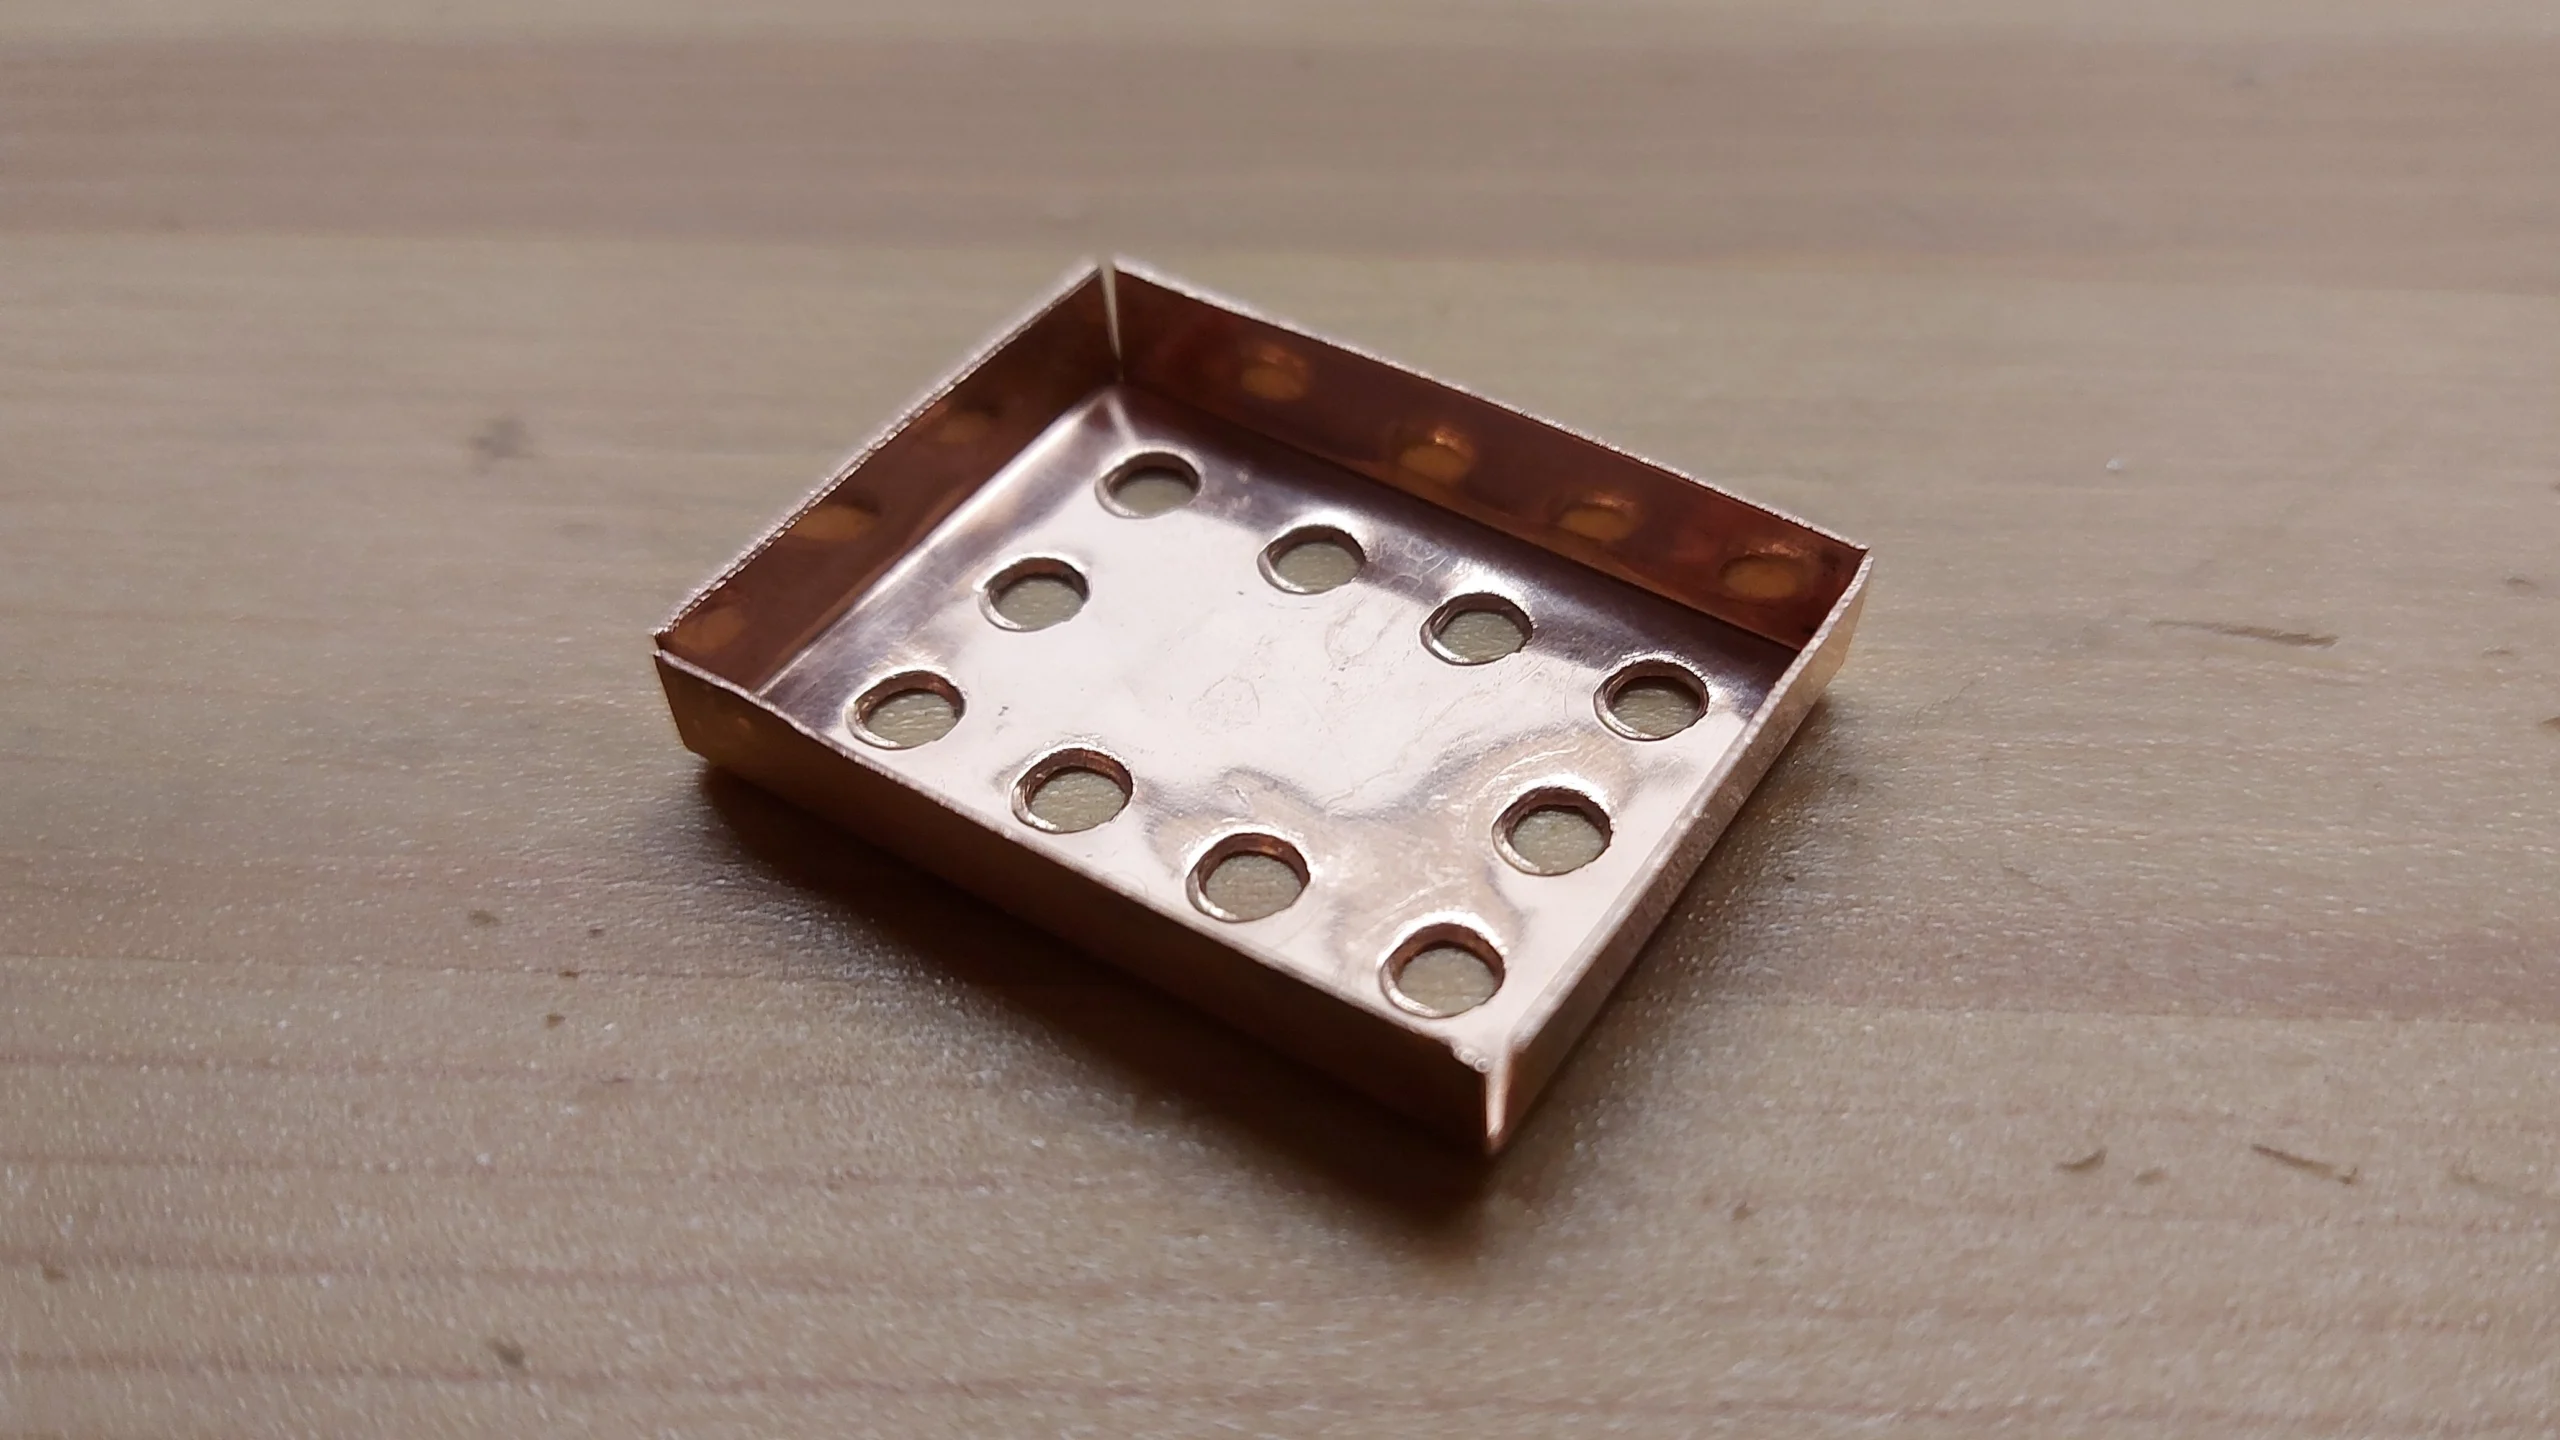
Build custom components to enhance the performance of your electronic projects.Custom Tools and Components
Fabricate specialized tools and components for your projects, tailored to your specific needs.Cosplay Props and Armor
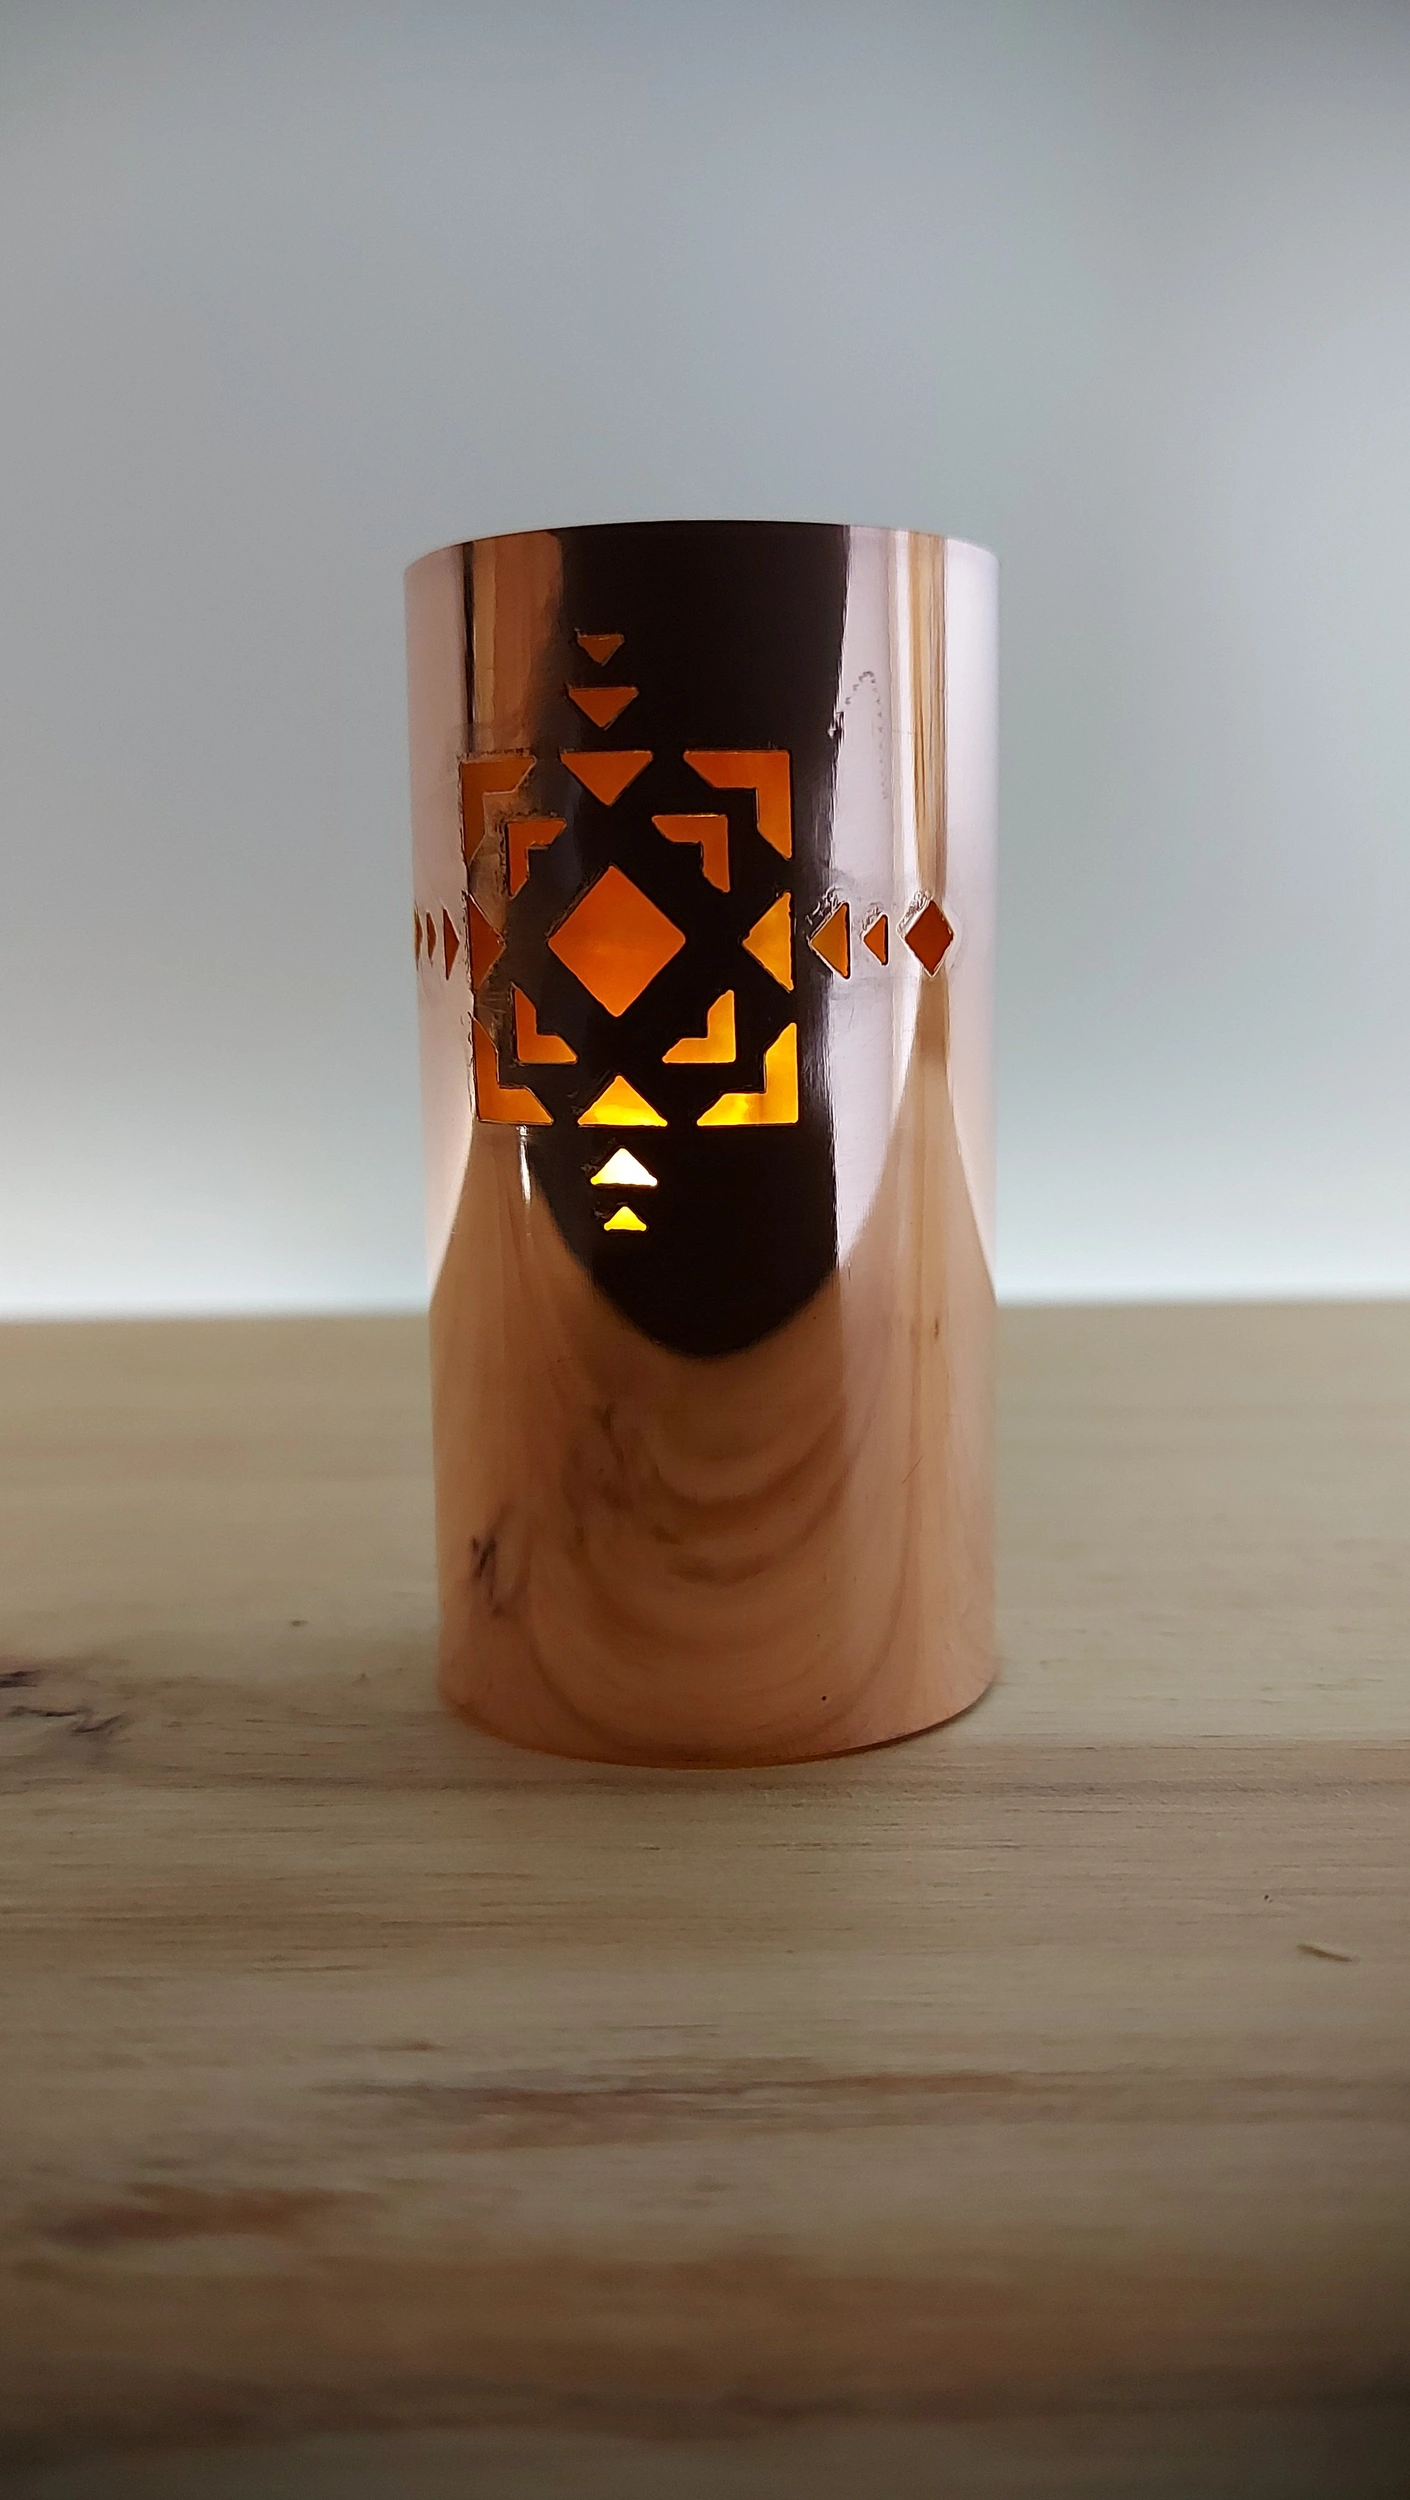
Add realistic metal details to your costumes and props, enhancing their authenticity and visual impact.Decorative Metalwork
Create custom metal decorations for your home or office, adding a touch of elegance and sophistication.
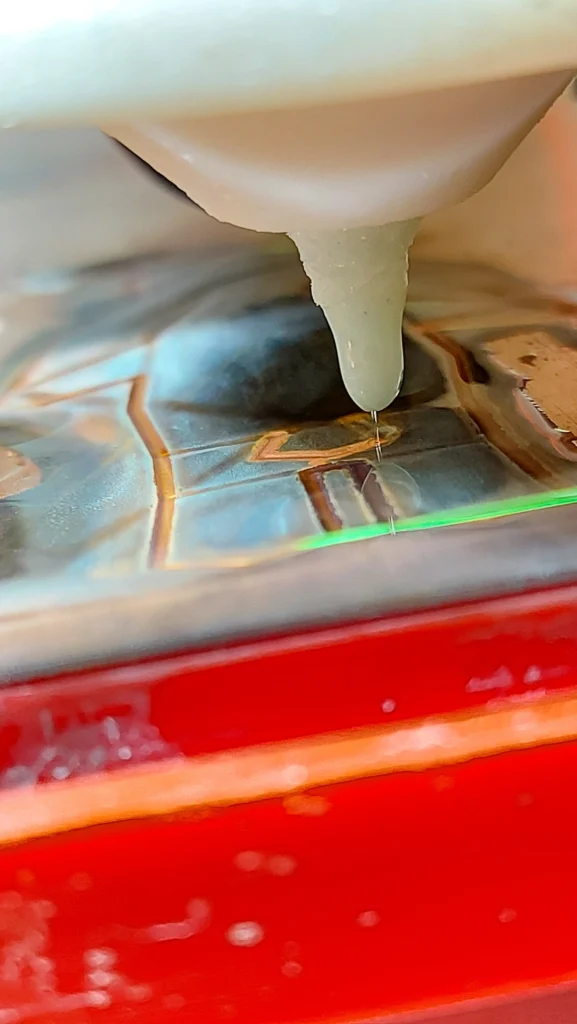
The Science Behind the Precision.
How it Works?
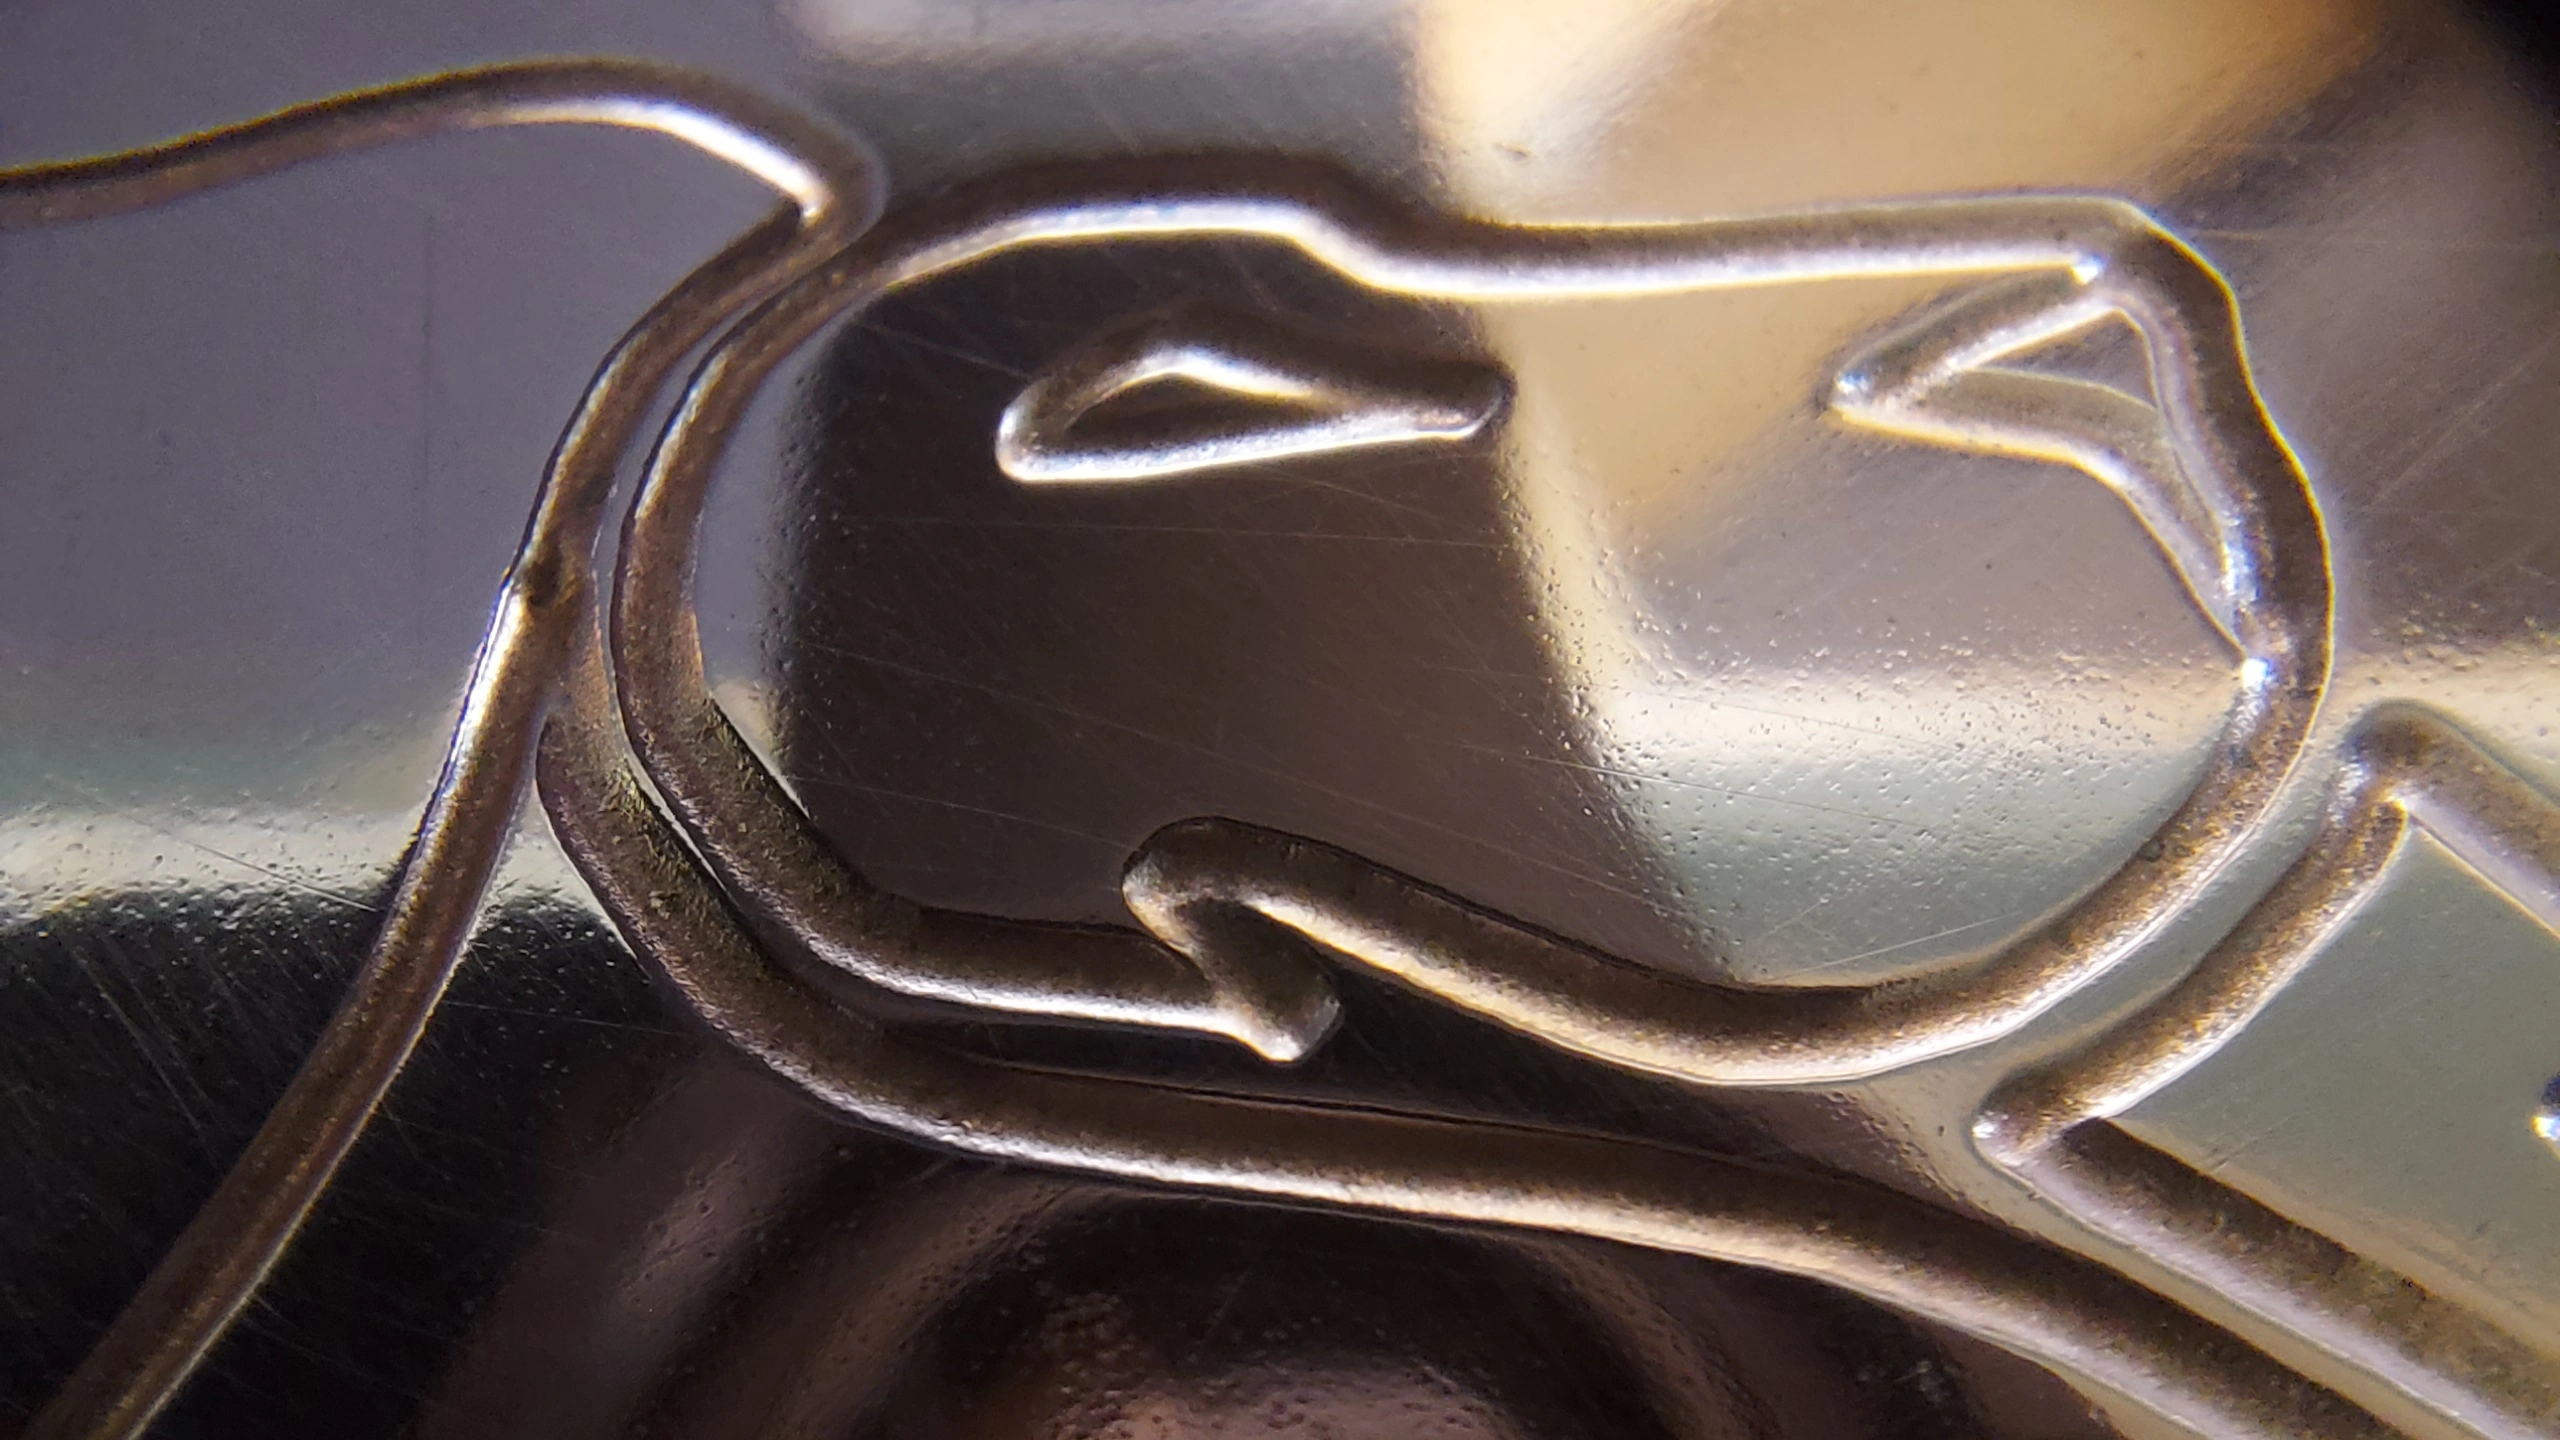
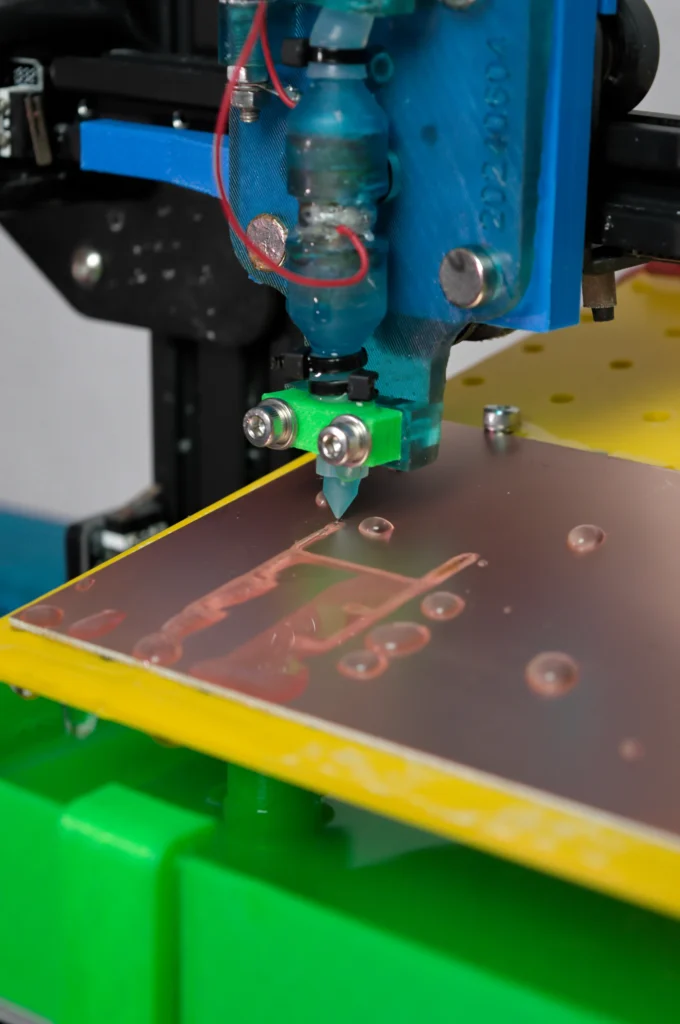
Liquid Blade 3D utilizes a controlled electrochemical process to precisely remove metal.
A fine jet of saltwater electrolyte, combined with an electrical current, selectively etches the metal surface according to your digital design.
Our user-friendly online converter transforms your SVG or Gerber files into GCode, which instructs your 3D printer to move the electrolyte jet with pinpoint accuracy.
This process eliminates the need for complex masking and hazardous chemicals, making metal etching safer and more accessible.
Technical Components
Extruder
The extruder will carry a tiny flow of water on the material with th current going through it.
Peristaltic Pump
The system comes with a handy peristaltic pump to have a stedy flow of salted water.
Current Generator
This generator powers the system with the right amount of electricity. You can monitor the status with the small monitor.
Work Board
The inclined work board helps you clamping the material on the printer. The water flows on it and it gets collected at the bottom.
Easy and Fast Setup and Maintenance.
Getting Started!
Setting up Liquid Blade 3D is a straightforward process:
- Attach the add-on: Securely connect the Liquid Blade 3D module to your 3D printer (initially compatible with the Ender 3 family, with plans for expanded compatibility).
- Design and convert: Create your design using vector graphics software (e.g., Inkscape) or circuit design software, then use our online converter to generate the necessary GCode.
- Prepare the electrolyte: Mix the saltwater electrolyte according to the provided instructions, ensuring optimal etching performance.
- Secure your material: Place your metal sheet or PCB on the dedicated tray, ensuring it is securely fastened.
- Start etching: Load the GCode file onto your 3D printer and initiate the etching process. Maintenance is equally simple. Regular cleaning of the tray and filtering of the electrolyte are essential to ensure consistent performance and longevity.
Expanding the Limits of Metal Fabrication.
Our Vision for Tomorrow
We are committed to pushing the boundaries of metal fabrication and making it accessible to everyone.
Our vision extends beyond metal etching to include electro-chemical metal 3D printing, enabling the creation of complex metal structures layer by layer.
Your support will play a crucial role in realizing this vision and bringing the future of metal fabrication to your desktop.
Roadmap
Our planning for future developments
Kickstarter & Liquid Blade 3D V.1
01
Step
Kistarter Campaign
We are focused on our Kistarter campaign, refining our marketing, talking to experts. Collecting feedbacks from clients and professionals. Last tweaks and bug fixes.
02
Step
Finish Development V.1
The Kickstarter campaign is successful!! Woah! We wrap up the development and start the production for all the bakers.
03
Step
Production and delivery
As soon as the first systems are printed, assembled and tested, we will start the shipping. We are committed to finish all deliveries by the end of the year.
Road to Desktop Metal Printing
04
Step
Development of the Metal Printer
Right after the delivery of all the LB3D machines we can will start focusing on another project we developed in these years: 3D Metal Printing. The add-on uses the same principle to add material instead of removing it.
05
Step
New prototypes and fixes
The Metal Printer at this stage is almost ready, we have several new prototypes to test and the overall project has been polished and made commercially viable.
06
Step
3D Metal production
We finally have a working commercial product ready! We fire up our printers and it’s production time.
Development and release LB3D V.2
07
Step
Upgrade for the Liquid Blade 3D
It’s time to revisit the LB3D V.1 and upgrade it with all the features we left behind.
and beyond…

Our Crowdfund Campaign is Live NOW!
Fund our Project!
Our project is on Kickstarter NOW! We are looking forward to complete it, ship it to our clients and see all the stunning projects you will create with it!
Don’t be shy, we have pledges for all pockets: from fun accessories created with our LB3D to the early bird version of the system with up to 50% off.
We are also on different social platforms, follow us and DM us your feedback!
Frequently Asked Questions
General Questions
What is Liquid Blade 3D, and how does it function?
Liquid Blade 3D is an add-on that transforms your 3D printer into a precision metal etching and cutting tool. It utilizes an electrochemical process involving a saltwater electrolyte to selectively remove material from conductive metal sheets.
Which 3D printer models are compatible with Liquid Blade 3D?
The device is designed and tested on the Creality Ender 3, ensuring direct compatibility. We are developing adapter solutions for other 3D printer models. A specific reward tier includes Liquid Blade 3D with a custom adapter for your printer. Once developed, these adapters will be available to all customers.
What materials can be etched by Liquid Blade 3D?
Liquid Blade 3D is compatible with all conductive metal sheets. We are currently expanding our material testing.
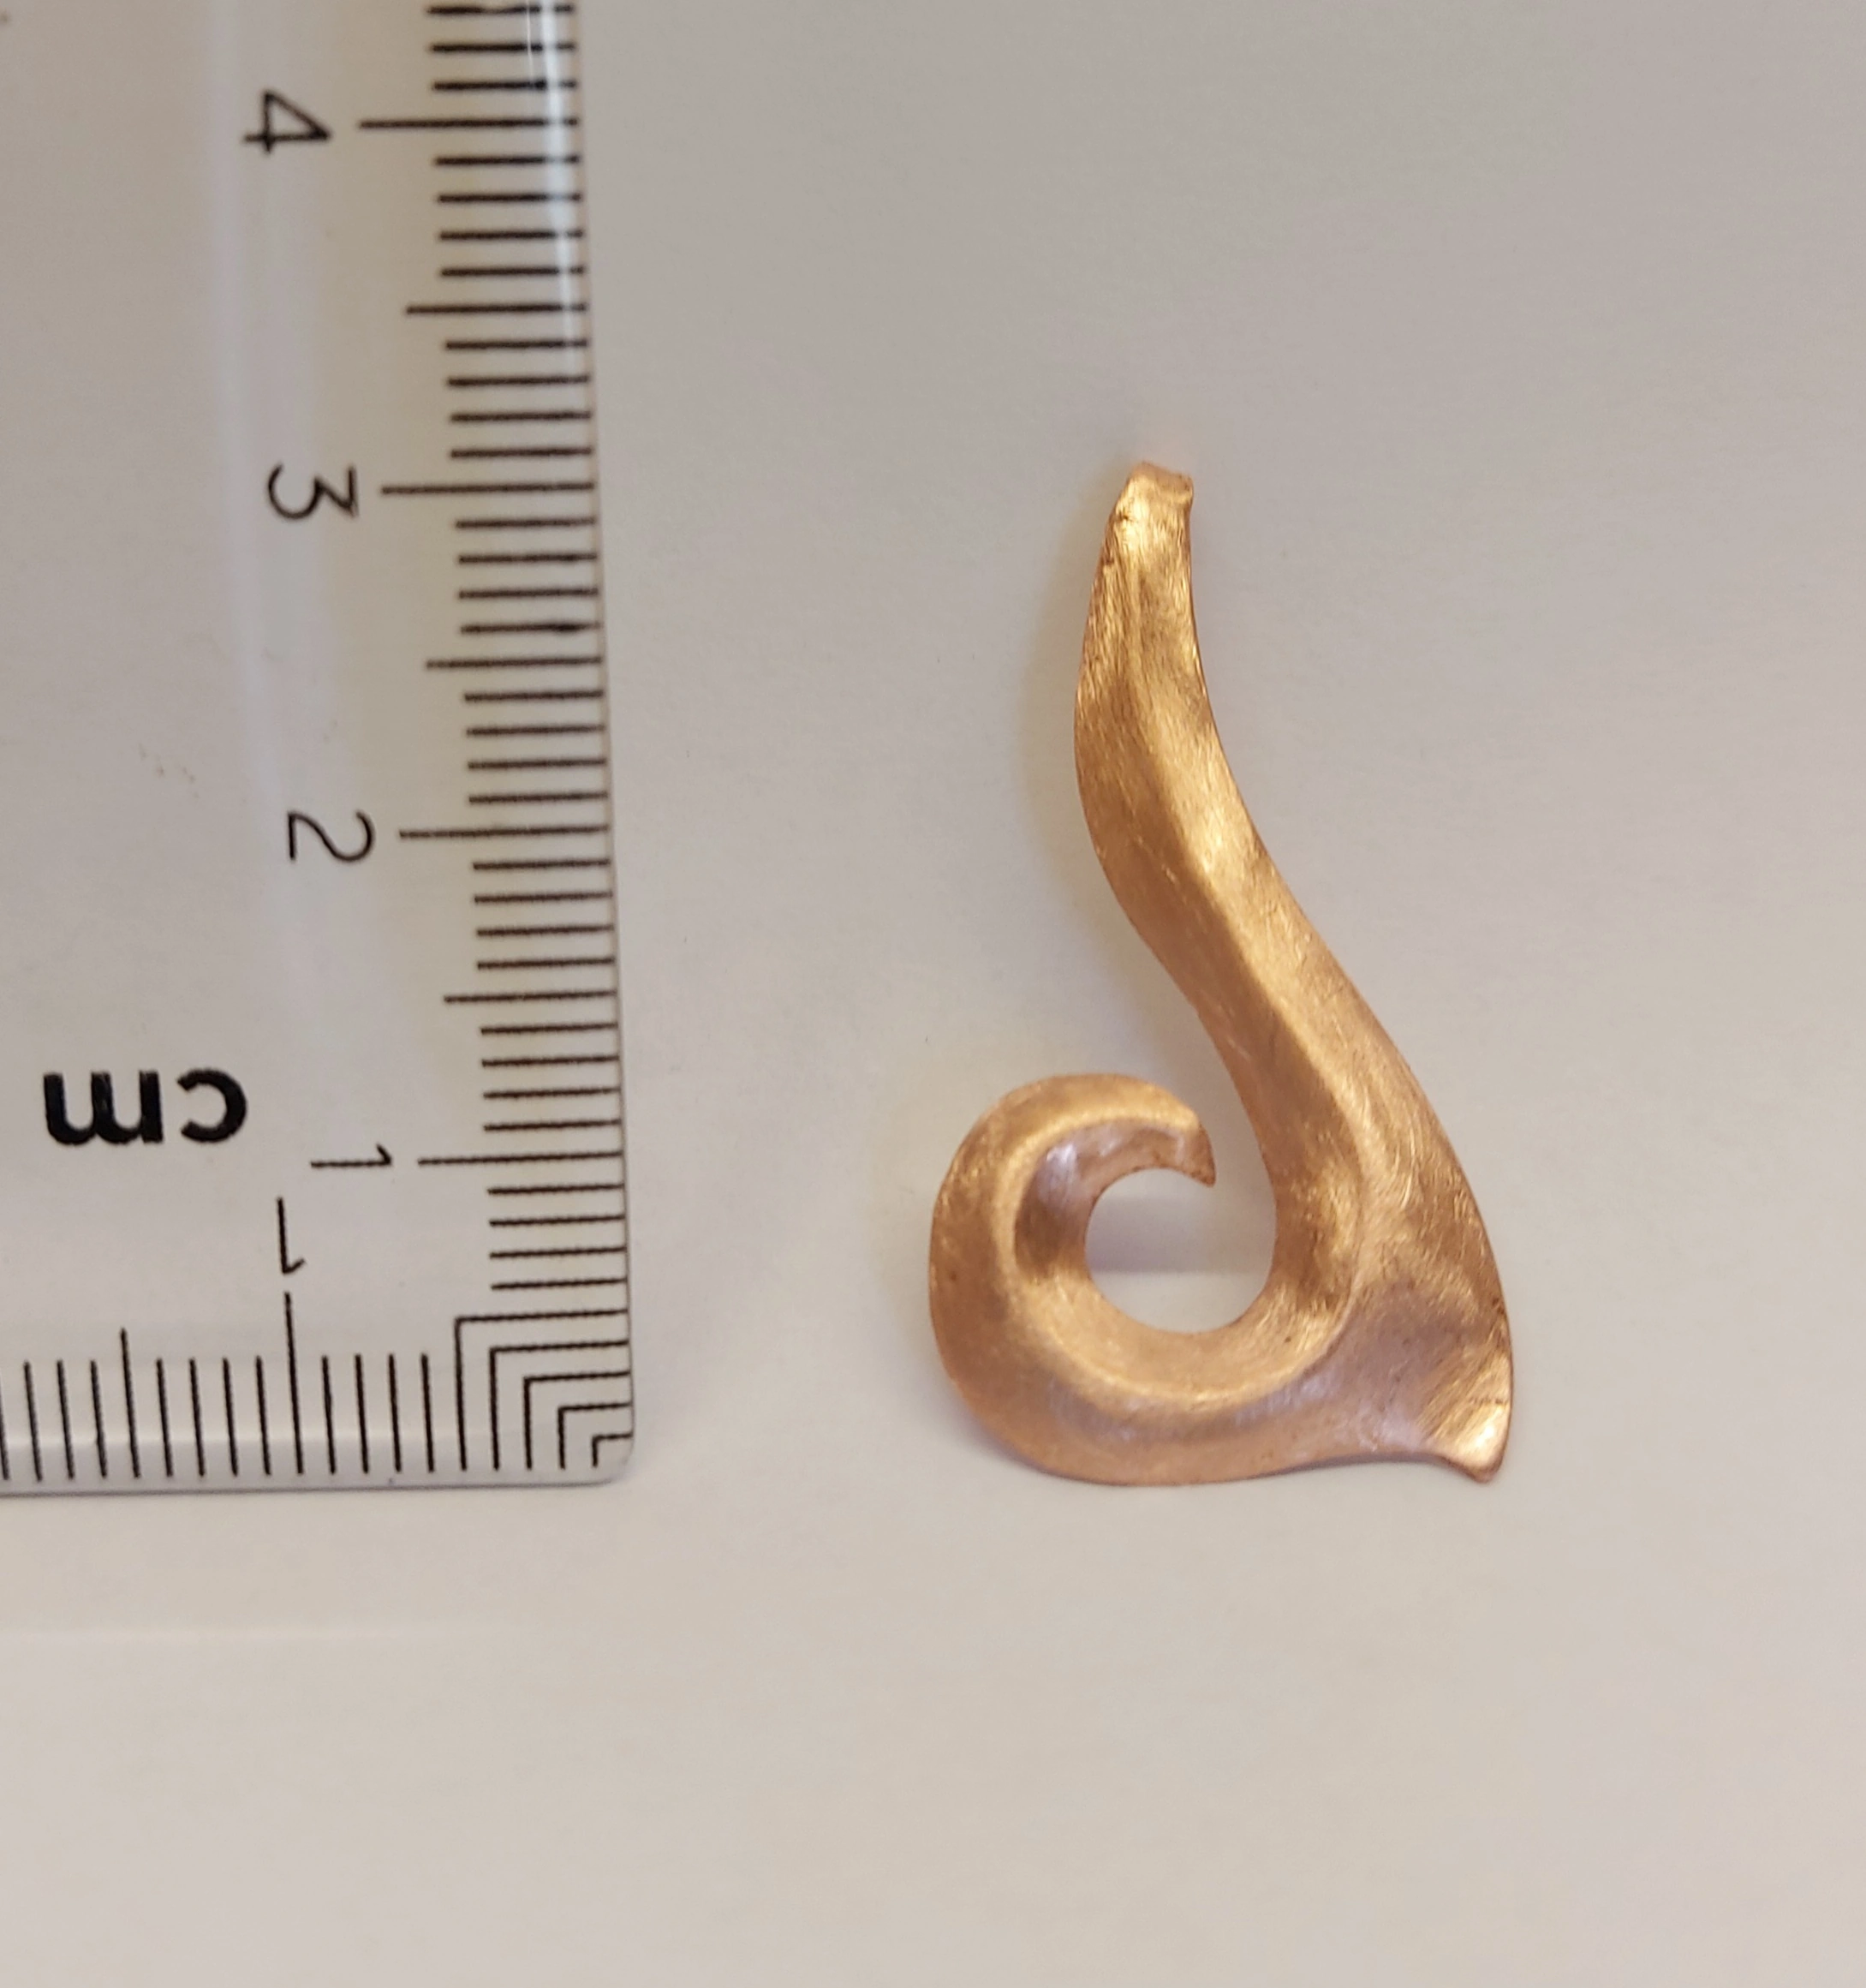
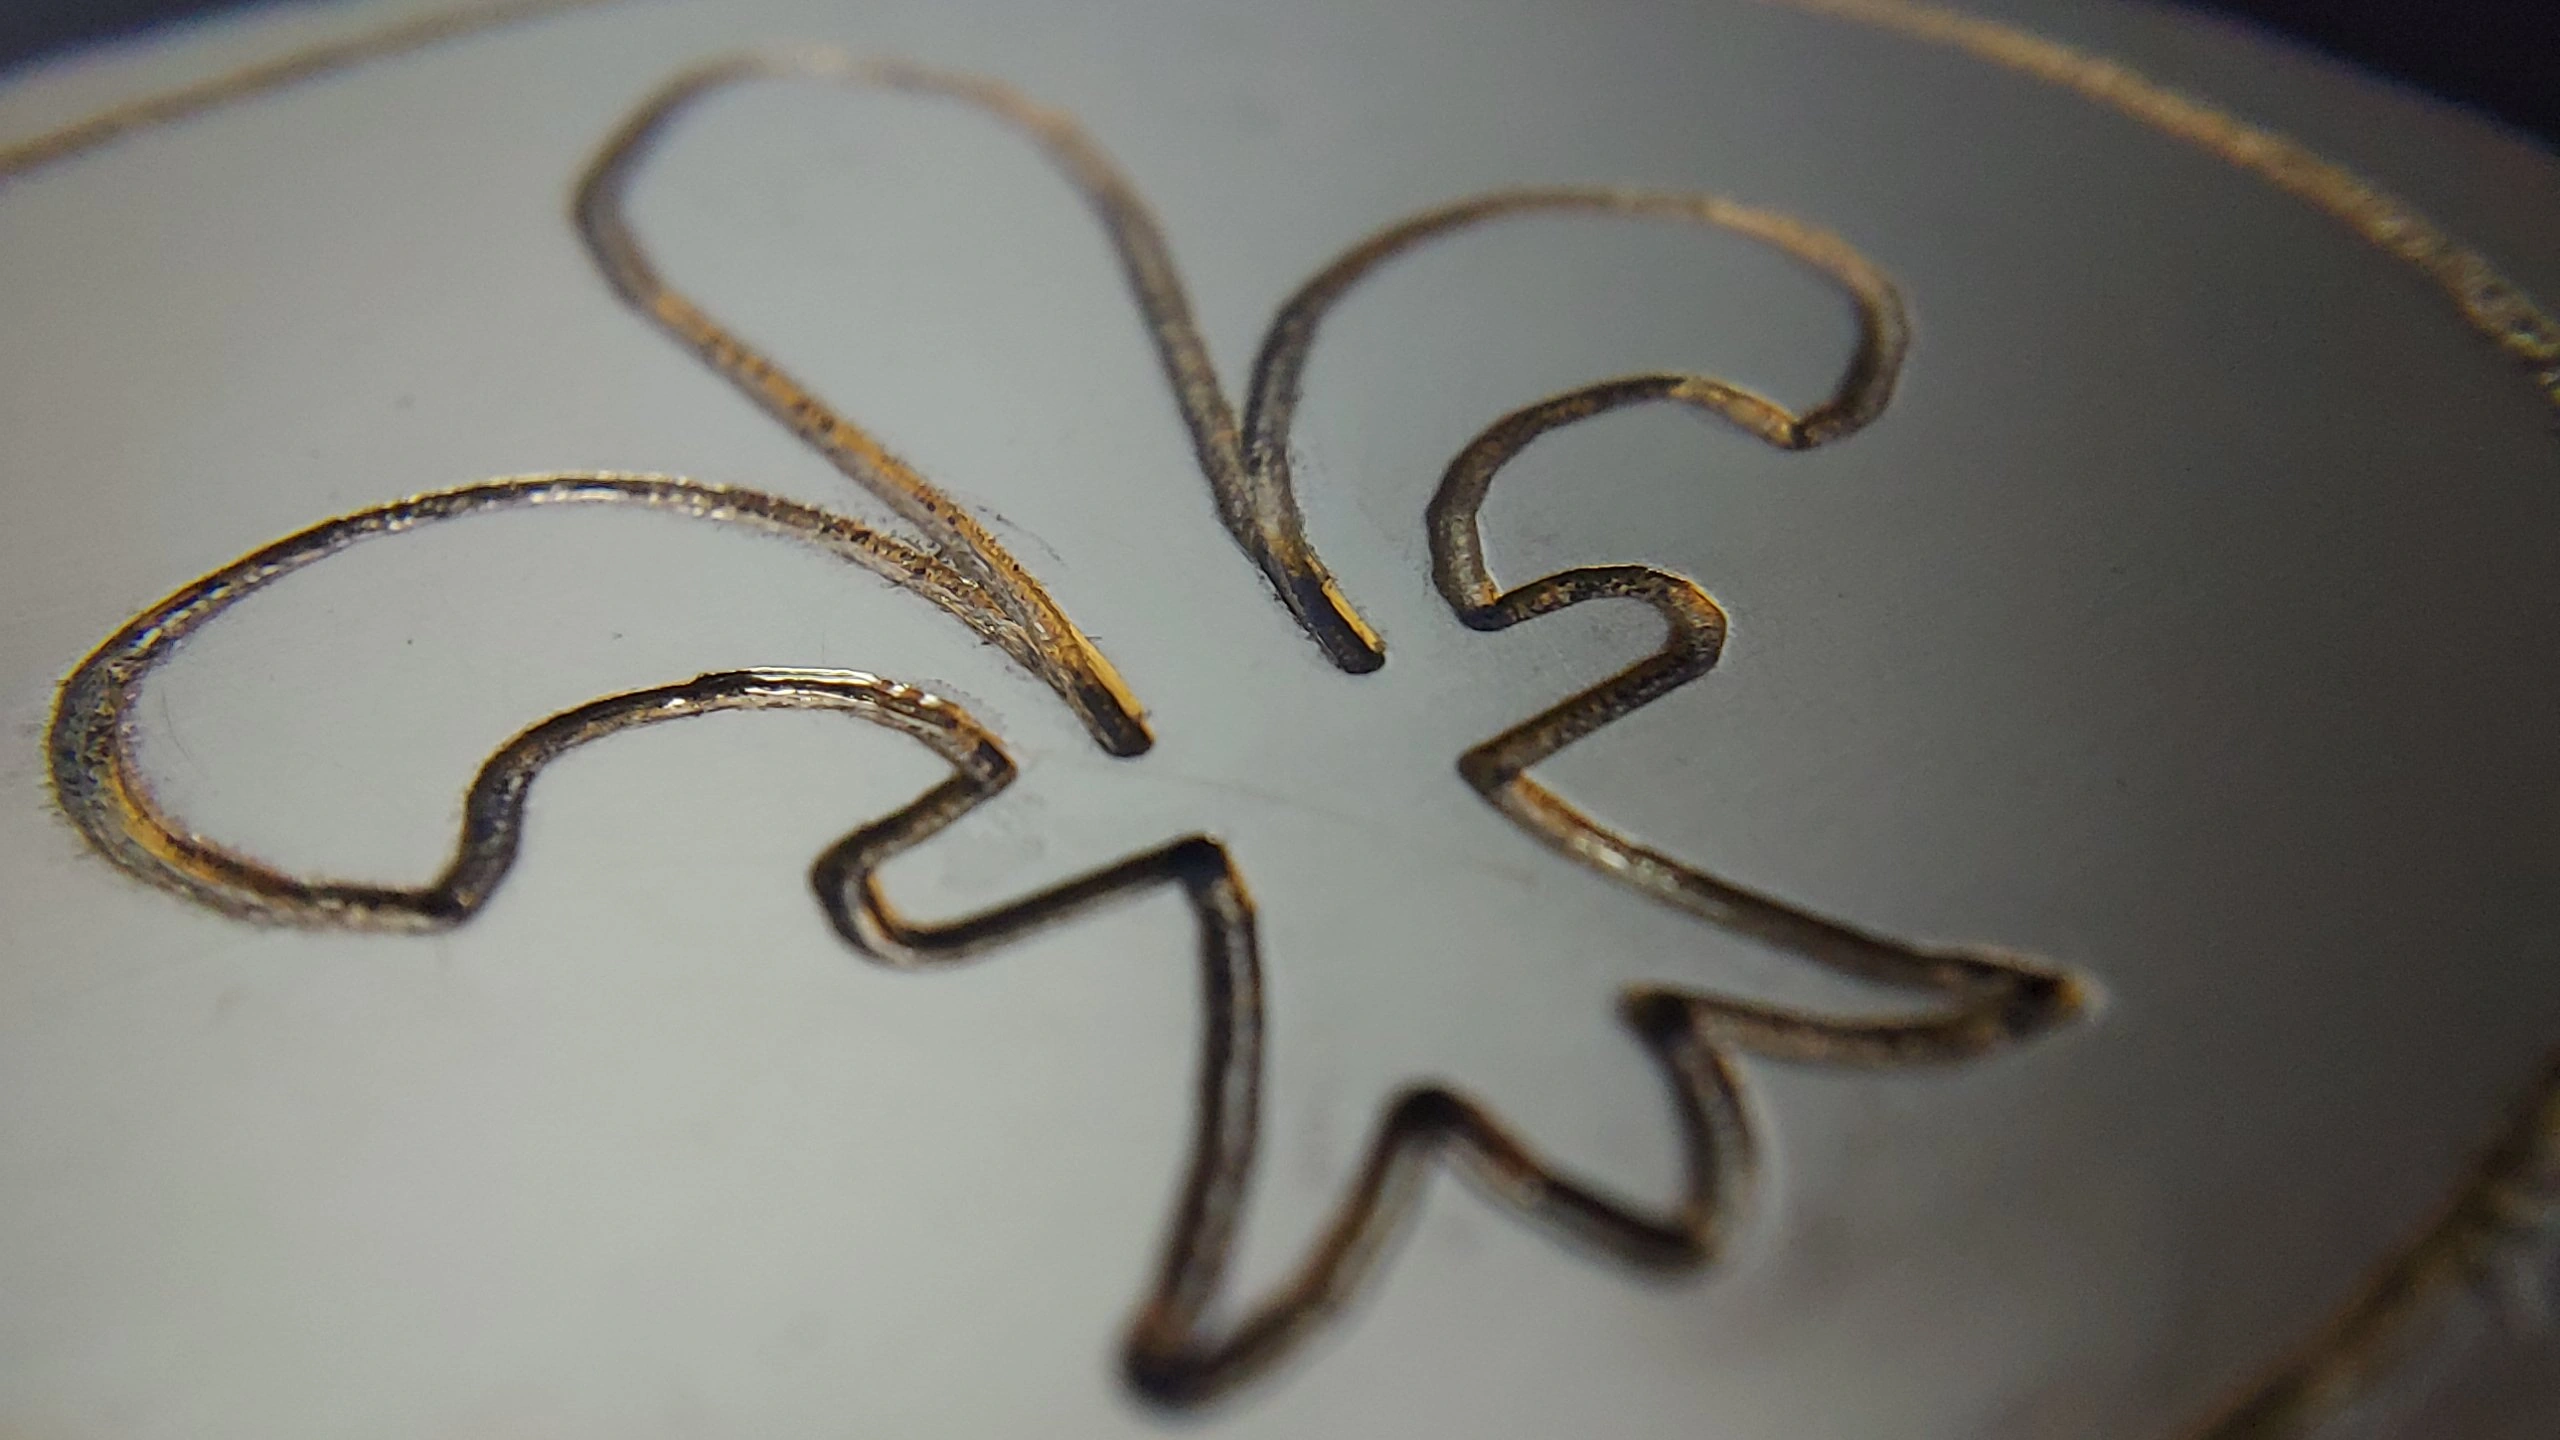
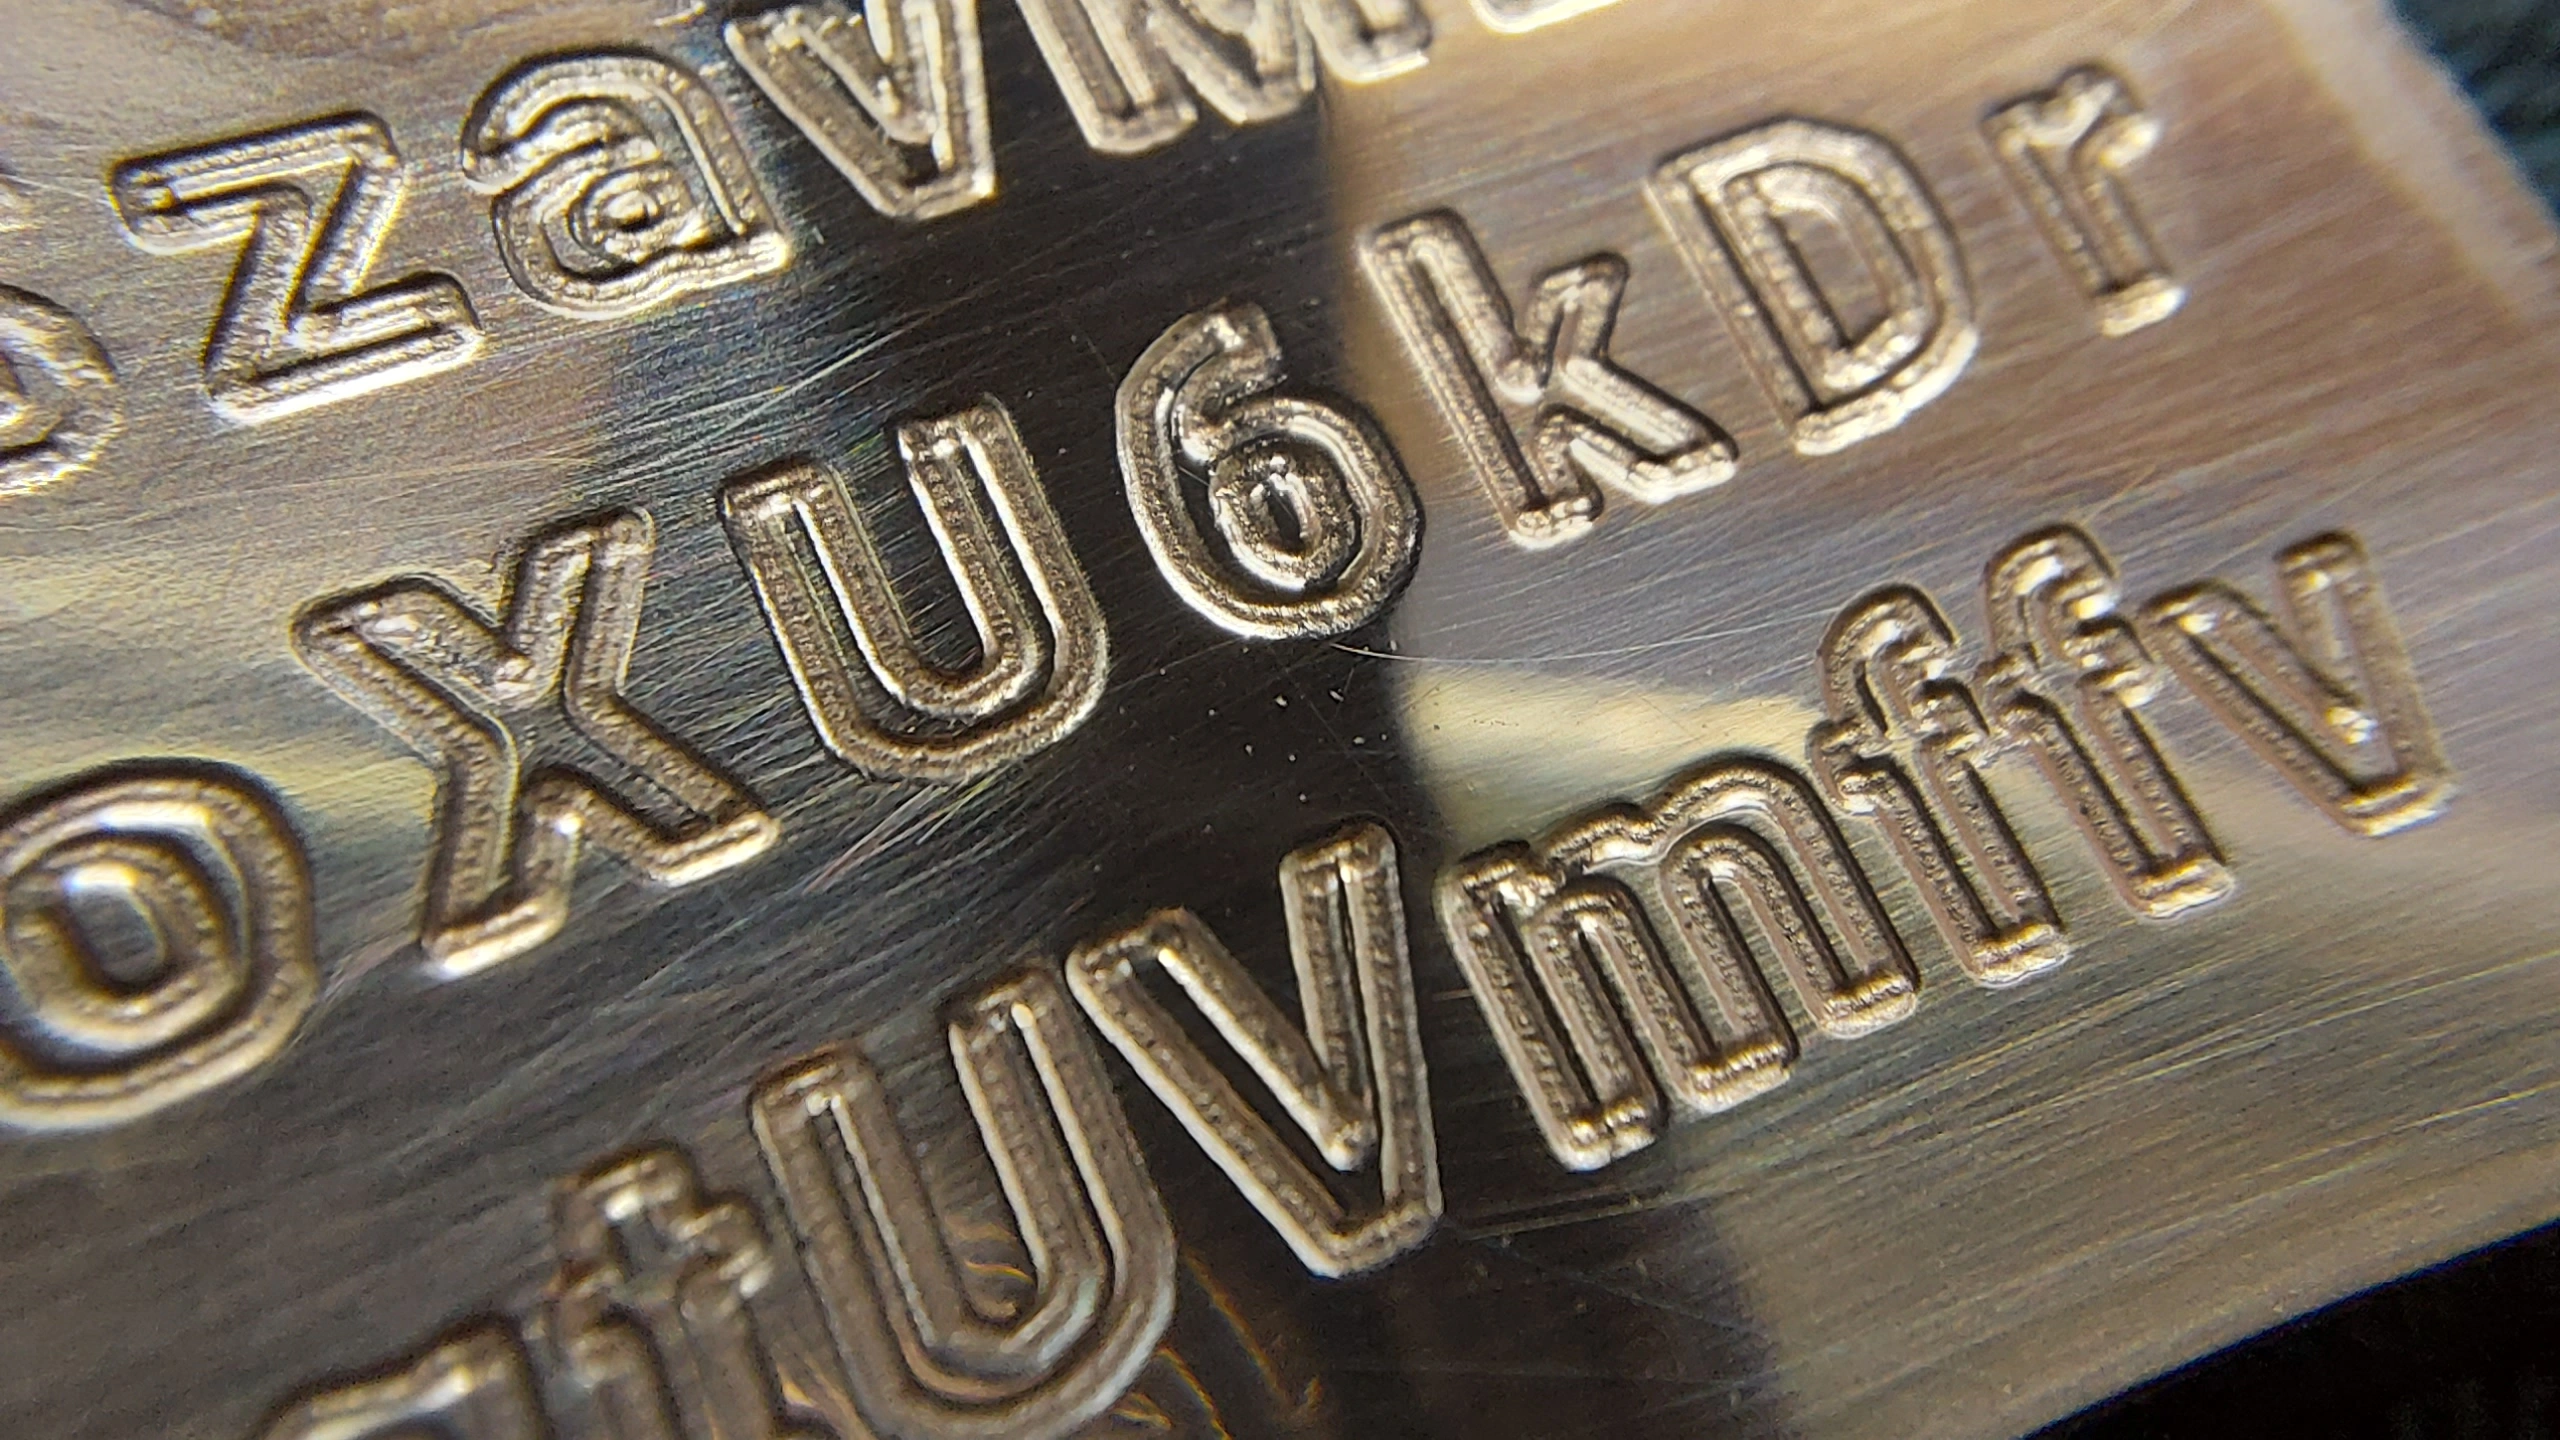
What level of precision does Liquid Blade 3D achieve?
Liquid Blade 3D achieves a precision of 0.3mm.
Is Liquid Blade 3D safe for home use?
Yes, Liquid Blade 3D is safe for home use. It operates without producing heat, smoke, or excessive noise.
What are the advantages of Liquid Blade 3D compared to traditional metalworking methods?
Liquid Blade 3D offers a lower cost than CNC machines, enhanced safety, quieter operation, and produces no metal debris.
Do I need prior metalworking experience to use Liquid Blade 3D?
No prior metalworking or chemical experience is required. Basic 3D printing skills are beneficial.
Technical Questions
What software is required for designing with Liquid Blade 3D?
We provide software for monitoring and controlling Liquid Blade 3D. You can create designs in Gerber or SVG format using any compatible graphics program.
How are design files converted to GCode?
Our software automatically converts design files to GCode.
What is the composition of the electrolyte solution, and where are the materials sourced?
The electrolyte solution is a mixture of water and 20% table salt, which can be prepared at home.
How frequently should the electrolyte solution be replaced?
We recommend replacing the solution every 10 hours of use. The solution can be filtered and reused.
What maintenance is required for Liquid Blade 3D?
The primary maintenance task is ensuring the nozzle remains clean and unobstructed.
What is the etching/cutting speed of Liquid Blade 3D?
The device etches or cuts at approximately 20 mm/min.
What is the power consumption of Liquid Blade 3D?
The system consumes a maximum of 40 watts.
Project Specific Questions
What is the warranty offered for Liquid Blade 3D?
We provide a standard 2-year warranty.
When will Liquid Blade 3D units be shipped?
Shipments will start 30 days after the campaign concludes, with units shipped sequentially as they are produced.
What happens in the event of overfunding?
Overfunding will allow us to scale up production, reduce costs, and accelerate the development of new projects, such as metal 3D printing.
What are the future development plans for Liquid Blade 3D?
Please refer to the response regarding overfunding for information on future developments.
Where can I view examples of projects created with Liquid Blade 3D?
Examples are available on our website: [www.ABC.com]
What is included in the Liquid Blade 3D kit?
The kit includes a current generator, water pump, water tray, nozzle with adapter, and all necessary cables and screws for immediate use.
This project looks familiar!
Good memory! Yes, we launched an early version of this project in 2022. (see here) We found many enthusiastic and interested people in the 3DP community but in the end, unfortunately, the the goal was too ambitious and we didn’t reach it.
However, we really liked this project and we continued to develop it. Now we feel is a good time to try again: we lowered our goal, improved dramatically the project and we will ship the LB3D regardless of the outcome of the campaign!
